
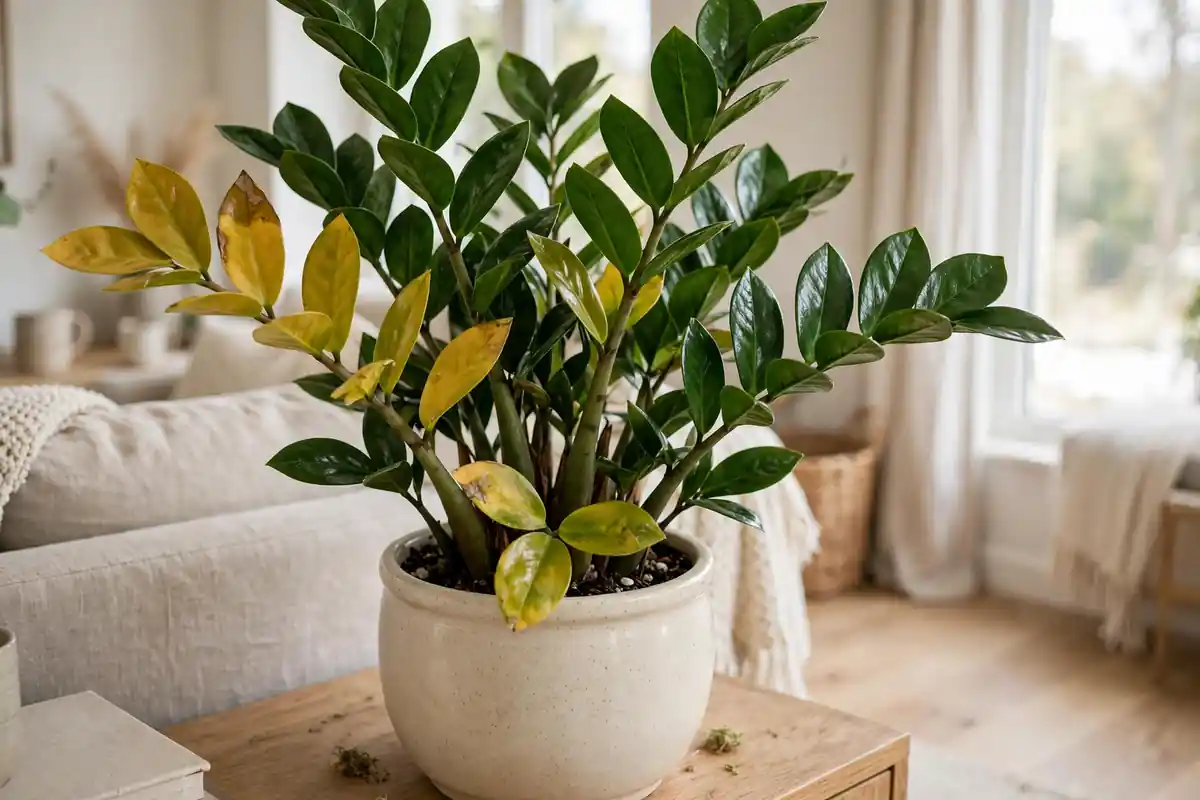
ZZ Plant Leaves Turning Yellow? Causes, the Rhizome Check & Honest Fixes
The ZZ plant is the one you’re not supposed to be able to kill. It survives the dark corner, the forgotten month, the vacation nobody watered for. So when its glossy leaves start turning yellow, it feels oddly personal — like you’ve failed the easiest test in houseplants.
Take a breath. You almost certainly haven’t done anything exotic wrong, because ZZ plants really only yellow for a handful of reasons, and the most common one is kindness: water. Here’s the fast answer, before the detail. A ZZ stores water in thick, potato-like rhizomes underground — think of them as the plant’s bank account. The leaves up top are just the spending. When leaves yellow, the question is never really “what’s wrong with this leaf?” It’s “what’s happening with the account?” A rhizome that’s firm and full can carry the plant through almost anything. A rhizome that’s been sitting in wet soil is quietly going bankrupt, and yellowing leaves are the first notice it sends.
One clarification before we go further, because it shapes everything: the odd oldest stem yellowing and dying back once in a while is just age — ZZs retire their oldest growth the way every plant does. But if you’re seeing yellow on several stems, or a stem going yellow fast, or leaflets yellowing in patches, that is not age, and it deserves a diagnosis. The good news is that ZZs are honest plants. The pattern of the yellow tells you most of the story, and a two-minute feel of the rhizomes tells you the rest.
First, Read the Pattern: Which Yellow Is Yours?
Before the causes, one piece of anatomy that makes ZZ diagnosis click — and that most guides skip. What looks like a ZZ “leaf” — the long, arching, feather-shaped frond — is actually a stem (technically a leaf stem, or rachis) carrying pairs of leaflets along it. The whole frond grows from a single point on the rhizome, lives as one unit, and eventually dies as one unit.
That means these are two completely different events:
- One or two leaflets yellowing on an otherwise healthy, green stem is a small, local thing — minor stress, a knock, the beginning of that stem’s slow retirement.
- One whole stem yellowing from the base up, leaflets and all, is that stem being shut down by the plant — or cut off by trouble below the soil.
Keep that distinction in hand and read your plant against this table:
| What you see | Most likely story | First move |
|---|---|---|
| One whole stem yellowing from the base, base feels soft or the stem pulls loose easily | Rhizome rot under that stem (overwatering) | Rhizome check, today |
| Several stems yellowing over a few weeks; pot stays heavy; soil still damp long after watering | Chronic overwatering — rhizomes stressed, rot starting | Stop watering; rhizome check this week |
| A few leaflets yellowing and dropping here and there; stems firm; plant otherwise glossy | Minor stress or the start of normal stem retirement | Watch; check your watering rhythm |
| The oldest, lowest stem yellows slowly over a month or more while new spears are rising | Natural senescence — normal | Cut it off at the base; nothing is wrong |
| Yellow with dry, crispy brown tips; stems slightly wrinkled; pot bone-dry and very light | Underwatering — the bank account is finally empty | Water deeply, then reset the rhythm |
| New growth coming in pale, yellow-green and thin; plant stretching toward the light | Too little light (tolerated, but not enjoyed) | Move to medium/bright indirect light, gradually |
| Bleached, yellow-white patches on the window-facing side only | Sunburn from direct sun | Move back from the glass or add a sheer curtain |
| Sudden yellowing after a cold night, a move, or sitting by a drafty window/AC vent | Cold damage (ZZs sulk below about 60°F) | Move to a steady, warm spot; assess over a week |
Two rows deserve emphasis. The mushy-base row is the only true emergency on this page — it’s the one pattern where waiting makes things worse by the day. And the senescence row is the one people most often treat as an emergency when it isn’t: a ZZ that is actively pushing up fat new spears while its single oldest stem fades is a plant doing exactly what healthy ZZs do.
The Causes, One by One
1. Overwatering and rhizome rot — the usual suspect
This is the cause behind most yellowing ZZs I hear about, and it’s a paradox built into the plant’s design. The rhizome evolved to bank water against droughts in the dry grasslands of eastern Africa. It is a storage organ — dense, starchy, and full of moisture by design. Storage organs are wonderful in dry soil and terrible in wet soil: keep one sitting in saturation and it suffocates, and then the organisms that live in every potting mix move in and start digesting it. The roots go first, then the rhizome itself softens, darkens, and turns to mush.
Above ground, the sequence looks like this: the plant can’t take up water properly through failing roots, even though the soil is wet. Stems yellow — often starting with the ones over the most damaged rhizome section. Bases go soft. A stem may lean, flop, or pull out of the pot with almost no resistance, its bottom end brown and slippery. The soil may smell sour. Owners almost always describe the same confusion: “It looks thirsty, but the soil is still wet.” That sentence is the diagnosis. A plant wilting over wet soil isn’t thirsty — it’s drowning, and its yellowing is happening because the bank has failed, not because the account is empty.
How it usually happens: not one dramatic flood, but a rhythm that’s slightly too generous, month after month — watering every week or two because that’s the schedule, in a pot whose soil never fully dries, especially in winter or in a low-light spot where the plant drinks slowly. A cachepot holding a hidden puddle, a pot with no drainage hole, or dense, old, compacted mix makes it worse. This is the same failure that turns succulent leaves to mush — any plant that stores water in its own tissue rots the same way when the storage stays soaked, which is why the rescue logic in our guide to succulent leaves turning mushy and falling off will feel familiar below.
The fix depends on how far it’s gone, which is what the rhizome check (next section) tells you. Mild case — rhizomes still firm, yellowing just starting: stop watering entirely and let the pot dry out completely, all the way through; move the plant to your brightest indirect spot so it can actually use water again; then restart on the ZZ rhythm from the watering section. Advanced case — soft rhizomes, mushy bases, sour smell: go straight to the rescue protocol further down. Do not “wait and see” with a soft rhizome. Rot doesn’t pause.
2. Underwatering — the slow, dry yellow
ZZs forgive drought longer than almost any houseplant, which is exactly why underwatering yellowing is real but uncommon: you have to ignore the plant for a long time — months, usually — before the bank runs dry. The rhizomes spend their reserves, wrinkle and deflate slightly, and the plant starts shedding: leaflets yellow, crisp at the edges, and drop; stems may look a little wrinkled or lose their sheen.
The texture gives it away, and this distinction matters because the two biggest causes of yellow ZZ leaves need opposite responses. Overwatered yellow is a wet problem: soft, sometimes translucent leaflets, soft bases, heavy pot, damp soil. Underwatered yellow is a dry problem: papery, crispy leaflets, firm bases, a pot that’s startlingly light, soil pulled away from the pot’s edges and bone-dry to the bottom. If you’re not sure which one you have, the pot’s weight and a finger pushed deep into the soil will tell you in ten seconds.
The fix is the pleasant one: water deeply and thoroughly, until it runs from the drainage hole — a parched mix sometimes needs a slow soak from below for half an hour to rewet properly — then empty the saucer and put the plant on a sane rhythm (see the watering section). Wrinkled rhizomes plump back up over the following weeks. Yellowing leaflets that have already crisped won’t recover, but the shedding should stop.
3. Too little light — tolerated, not loved
ZZ plants have a marketing problem: they’re sold as low-light plants, and “low light” gets heard as “no light.” A ZZ will tolerate a dim corner for a remarkably long time — it’s one of the most shade-patient houseplants there is — but tolerance is survival mode, not health. In genuinely low light the plant runs a deficit: growth slows to nearly nothing, new stems come in thinner, paler, and more widely spaced, and the plant may shed lower leaflets to balance its books. Pale, yellow-green new growth on a plant that hasn’t moved house or changed watering is usually a light story.
There’s a second, sneakier low-light effect: a plant in dim light drinks very slowly, so a watering rhythm that was safe in a bright room quietly becomes overwatering in a dark one. Plenty of “mystery” ZZ yellowing is really this combination — same can, same schedule, darker corner, wetter rhizomes.
The fix: move the plant to medium or bright indirect light — a few feet from an east or south window, or right up to a north one — and it will reward you with thicker, glossier, faster growth. Move a plant that’s been in deep shade gradually over a week or two to avoid scorching it, and once it’s brighter, expect it to drink a little faster — but keep the fully-dry rule.
4. Too much direct sun — the bleached look
The opposite extreme. ZZ leaflets in hard, direct sun — especially afternoon sun through glass, and especially on a plant that lived in shade before — scorch. The damage shows as bleached, yellow-white or papery tan patches, almost always on the window-facing side and the most exposed leaflets, while the shaded side of the same plant stays green. It appears fast, within days of a move to a sunnier spot.
The fix is simply placement: pull the plant a few feet back from the window or hang a sheer curtain. Scorched leaflets won’t re-green (nothing on this page re-greens — see the verdicts below), but no new damage should appear once it’s out of the beam. If the rest of the plant is healthy, this is the least worrying cause on the list.
5. Natural senescence — the oldest stem retires
A ZZ stem doesn’t live forever. Each one rises, holds its leaflets for a good long while — commonly a couple of years or more — and eventually the plant retires it: the whole stem yellows slowly, from the leaflets down, over weeks, and dries. This is the plant recycling what it can and redirecting energy to new spears. On a growing plant, losing the occasional oldest stem is not a symptom; it’s a sign of a working plant.
How to tell senescence from trouble: it’s one stem (occasionally two), it’s the oldest and usually the lowest or most shaded one, it’s slow (weeks to months, not days), the base stays firm until late in the process, the soil and the rest of the plant are fine, and ideally you can see new growth somewhere. Compare that with rot, which is fast, wet, soft at the base, and usually takes several stems in the same neighborhood of the pot.
The fix: none, beyond tidiness. When the stem is fully yellow, cut it off cleanly at the base with clean scissors. Don’t yank it — a half-retired stem still attached to the rhizome can tear tissue if it’s pulled before it’s ready.
6. Nutrients and pot-bound limits — the quiet constraints
ZZs are light feeders, and true nutrient-deficiency yellowing is less common than the fertilizer aisle would like you to believe. It does happen on plants that have sat in the same exhausted mix for years: a general paleness, slow or no growth, new stems coming in small. Far more common is the opposite — over-feeding. Salts from repeated fertilizer doses accumulate in a pot that’s watered sparingly and rarely flushed, and the result is root stress that can yellow leaflets, often with brown, crispy tips joining in. If the yellowing started or worsened after you began a feeding routine, suspect the routine.
The fix for deficiency: a balanced houseplant fertilizer at half strength, once or twice in the growing season — that’s genuinely all a ZZ wants. For suspected salt buildup: flush the pot thoroughly with plain water (several pot-volumes, draining freely), then feed less, less often. Our guide to why pothos leaves turn yellow walks the same fertilizer-salt pattern on a thirstier plant, if you’d like the comparison.
Pot-bound is the other quiet constraint, and ZZs flip the usual script. They like a snug pot — less spare soil means less water sitting around the rhizomes, and they grow happily crowded for years. But eventually the rhizomes win: they swell until they deform a plastic pot, push the soil level up, occasionally crack a pot outright, and leave almost no mix to hold moisture or nutrients. A plant whose pot is visibly bulging, whose rhizomes are heaving out of the surface, or that dries out implausibly fast despite a full watering may be yellowing partly from sheer lack of soil. Repot one size up, in spring if you can, into a gritty mix — and take the chance to do the rhizome inspection below while it’s unpotted anyway.
7. Cold — the quiet winter cause
ZZs come from warm country and they’re more cold-sensitive than their tough reputation suggests. They’re happiest roughly between 65 and 80°F and start to sulk below about 60°F. A plant pressed against a cold windowpane in January, sitting in a draft from a frequently opened door, or parked in an air-conditioning blast can yellow in response — sometimes a whole stem, sometimes patches — often a few days after the cold exposure rather than during it.
The fix: move the plant to a steady, warm, draft-free spot and give it a week or two. Cold-damaged tissue won’t recover, but if the rhizomes stayed warm enough — and soil insulates them well — the plant carries on and replaces what it lost. If stems go soft and mushy after a genuine freeze rather than merely yellow, treat it like the rescue protocol: cut away what’s dead and check what’s left underground.
The Rhizome Check: The Diagnosis That Actually Decides It
Everything above the soil argues; the rhizomes settle it. You have two levels of check. Start with level one — it answers most cases without disturbing the plant.
Level 1: The squeeze test (no unpotting)
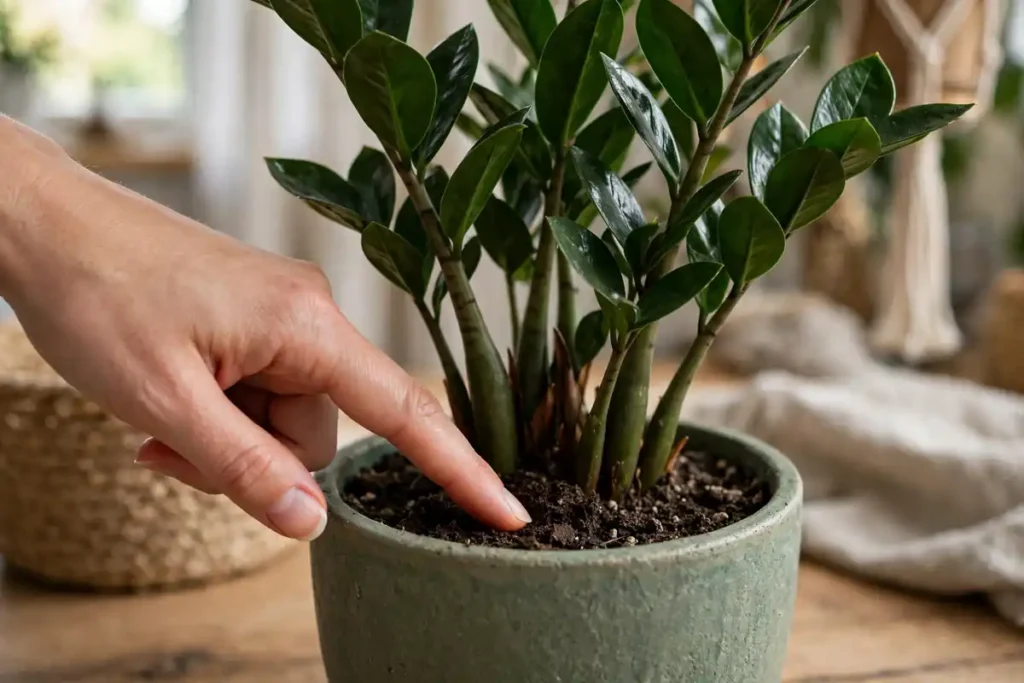
Push the top inch of soil aside at the base of the plant, right where the stems disappear, and press a rhizome gently between your fingers. You’re feeling for the thing every description of this plant reaches for, because it’s accurate: a healthy rhizome feels like a firm, raw potato — dense, solid, unyielding, with a pale tan to brownish skin. A plant can have several, packed together like a cluster of small potatoes.
- Firm and potato-solid, all the way around: the bank is sound. The yellowing is coming from light, age, salts, cold, or thirst — work the causes list, not the rescue protocol.
- Soft, squishy, or deflated spots; skin that wrinkles or slips; a sour smell when you get close: rot has started in the rhizome. Go to level two.
- Firm but shriveled and wrinkled, in a bone-dry, feather-light pot: a spent bank, not a rotten one. That’s the underwatering picture — water deeply and skip the surgery.
You can also squeeze the stem bases above the soil line. A healthy ZZ stem base is firm and almost woody; a base that’s soft, or a stem that rocks loosely in the soil or lifts out with a gentle tug, is telling you the rhizome beneath it has failed.
Read what your fingers find against this table:
| Squeeze result | What it means | Your move |
|---|---|---|
| Firm, plump, gently resistant | Healthy stored water — the bank is sound | Look elsewhere: light, age, or watering timing |
| Soft and mushy, maybe dark or soft at the base | Rot has reached the stem or rhizome | Go to Level 2 below, then the rescue protocol |
| Thin, wrinkled, deflated and dry | The plant is spending its reserves | That’s thirst, not rot — water deeply once |
Level 2: The full unpot inspection
Unpot when level one finds softness, when several stems are yellowing and the cause isn’t obvious, or when the plant smells sour. Do it when you can work unhurriedly, over newspaper.
- Tip the plant out — squeeze a flexible pot, or tap a rigid one on its side and slide the root ball free. ZZ rhizomes pack tight; gentle firmness is normal, force is not.
- Shake and brush the mix off the rhizomes and roots. (A gentle rinse is fine and makes the reading easier; let things surface-dry for a few minutes before you judge colors.)
- Read the rhizomes. Healthy: firm and plump at every point, skin pale tan to light brown, cross-section (if you cut) creamy white and solid. Roots healthy too: white to light tan, firm. Rotting: patches or whole rhizomes that are dark brown or black, soft or mushy under pressure, sometimes watery or slimy, sometimes hollowing; roots brown, stringy, or slipping their outer sheath; a sour or rotten smell. The rot usually starts on the underside or the wettest side of the pot.
- Read the proportions. One soft rhizome among several firm ones is a rescue with good odds. Firm rhizomes under yellow stems can mean the trouble was shallower (roots only) or above ground entirely. Every rhizome soft to the center is the verdict nobody wants — that’s the propagation conversation below.
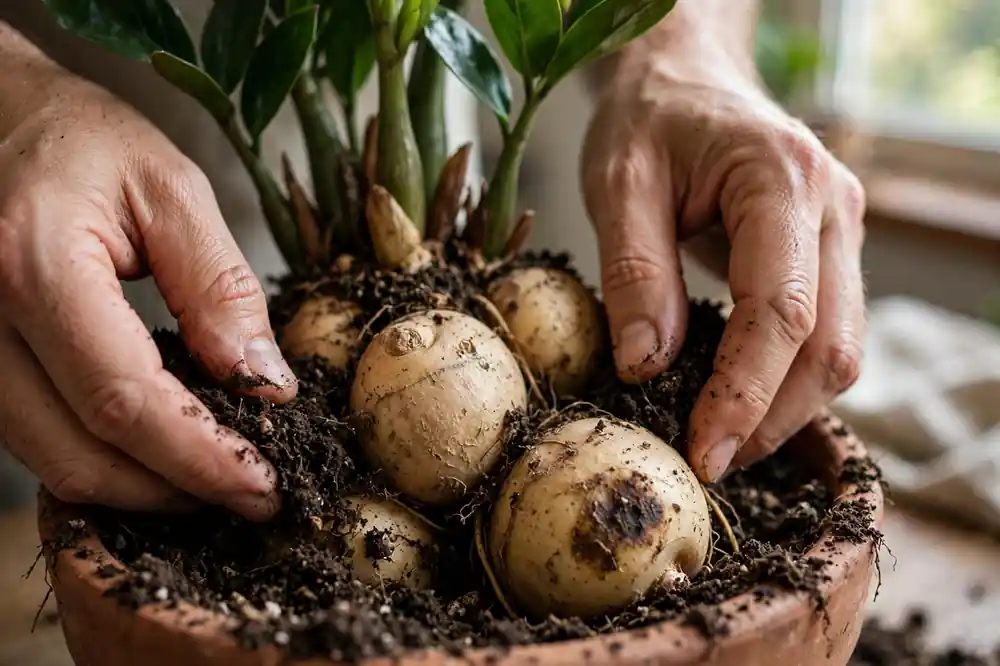
A safety note before anyone picks up a knife: ZZ sap contains the same calcium-oxalate crystals as many of its aroid relatives and can irritate skin. Wear gardening gloves for the inspection and rescue, and wash up afterward — especially if you’ll be cutting rhizomes.
The Honest Verdict: What Can and Cannot Be Saved
This is the section most ZZ advice dances around, so here it is without the dancing:
- A yellow leaflet never turns green again. Chlorophyll, once dismantled, isn’t rebuilt in that tissue. No feeding, misting, or product changes this. Yellow leaflets can be snipped off for looks or left until they drop; the plant has already written them off.
- A yellowing stem does not recover either — but that sentence matters less than it sounds, because a ZZ’s stems are replaceable parts. Cut a fully yellow stem off at the base and forget it. The plant’s future is not in that stem; it’s in the rhizome.
- A firm rhizome is a living plant, even if every stem above it is gone. Given dry conditions and time, a sound rhizome pushes up new spears. This is the single most hopeful fact about ZZs: you can lose the entire visible plant and still not have lost the plant.
- A partly rotted rhizome can be saved — by cutting. Rot left in place spreads through the tissue; rot cut back to firm, pale, healthy tissue stops. The rescue is mechanical, not chemical. There is no soak or spray that reverses rot inside a rhizome.
- A rhizome that is soft and dark all the way through is gone, and no protocol brings it back. If every rhizome is in that state, the plant is honestly finished — and the right move is to salvage any still-green stem or leaflet for propagation, and compost the rest away from your other plants.
- Timelines are slow, and that’s normal. A ZZ is a slow plant in health and slower in recovery. After a rescue, the first trustworthy sign — a fat new spear nosing out of the soil — commonly takes weeks and can take a few months. Judge a rescue by “no further decline, then a spear,” not by a calendar. Any advice promising a yellowed ZZ fixed in a fortnight is selling something.
The Rescue Protocol: Saving a Rotted ZZ
For confirmed rot — soft rhizomes, mushy stem bases, sour soil. Work today; this is the one case where “today” is literal.
- Stop watering and unpot the plant. Get it out of the wet mix entirely. Rot continues as long as the tissue sits in saturation.
- Expose everything. Shake off the mix and rinse the rhizomes and roots gently so you can see the color line between healthy tissue and rot.
- Cut away all the rot. With a sharp knife or scissors, cut off every soft, dark, mushy piece of rhizome and every brown, stringy root — and cut back into firm, pale tissue, a little beyond the visible edge of the damage, not right at it. Rot’s leading edge runs ahead of what you can see. Keep cutting until every cross-section you leave behind is solid and creamy-pale.
- Sterilize as you go. Wipe the blade with rubbing alcohol (70% isopropyl) before you start and again between cuts — a blade that just passed through rot will carry it into the next clean rhizome. Gloves on: the sap irritates skin.
- Deal with the stems. Remove stems whose bases are soft or rotted, cutting at the rhizome. Firm stems over firm rhizome sections can stay. Fully yellow stems come off regardless — they’re done.
- Let the cuts dry and callus. Set the trimmed rhizomes somewhere dry, shaded, and airy for 24–48 hours until the cut faces are dry to the touch. This drying step does most of the protective work. A light dusting of ground cinnamon on the dry cuts is a reasonable finishing touch; it’s optional, and it is not a substitute for the cutting or the drying.
- Repot dry, snug, and gritty. Fresh, fast-draining mix — a cactus/succulent mix with extra perlite or pumice worked through — in a clean pot with drainage holes, sized to the rhizomes that remain (a smaller pot than before is often right: less spare wet soil around them). Set the rhizomes just under the surface. Do not reuse the old mix, and scrub the old pot or use a fresh one.
- Withhold water. Don’t water the repot in. Wait about a week — longer is fine — then water thoroughly and only once the mix has dried completely through again. You are restarting this plant on drought rules.
- Bright indirect light, no fertilizer. Light is what lets the plant rebuild; fertilizer on a plant with a fraction of its root system just adds salts to a wound. Skip feeding for at least a couple of months.
- Then wait, and watch for the spear. Keep the routine bone-dry between waterings. If surviving stems stop yellowing and hold, the rescue is taking. The new spear, when it comes, is the signature on the recovery.
This is the same surgery, in spirit, that saves a drowning snake plant — another rhizome-banking plant whose rescue comes down to cutting back to firm storage tissue and repotting dry — and our snake plant drooping guide walks through that plant’s version of the inspection.
Salvage by Propagation: When the Rhizome Can’t Be Saved
If the inspection finds the rhizomes gone but some green growth remains, you haven’t lost the genetics — ZZs propagate readily, just slowly. Take your material before you compost the plant.
Stem cuttings. Cut a healthy green stem (or the healthy upper part of one) with a clean blade. It can root in water — set the cut end in a glass, change the water weekly, and wait for roots and eventually a small rhizome to form at the base — or directly in a small pot of gritty mix kept barely moist. Water rooting is slower than it looks and the rhizome knob at the base can take months to appear; pot it up once roots are an inch or two long.
Single leaflets. The famous party trick: a single leaflet can become a plant. Snip healthy green leaflets with a tiny bit of their stalk, let the cut dry a few hours, and set them stalk-down in gritty mix or perlite, kept lightly moist under bright indirect light. Now the honest part that most versions of this trick omit: the leaflet first has to build a rhizome from nothing. Expect months — commonly the better part of a year — to get a marble-sized rhizome with its first small stem, and longer to get a plant you’d call a plant. It works. It is simply ZZ time, and it’s worth doing with leaflets from a plant you loved rather than as a quick replacement.
Rhizome division. If only some rhizomes rotted and others are completely firm, your “propagation” is simpler: after the rescue cuts, pot the firm divisions separately. Each solid rhizome chunk with a stem (or even without one) is effectively a new plant on the normal ZZ schedule.
The ZZ Watering Truth: You’re Topping Up a Bank
Most ZZ trouble, in both directions, comes from watering this plant like a typical houseplant. It isn’t one. A peace lily wants evenly moist soil; a ZZ wants a drought with occasional weather.
- The soil must dry completely. Not the top inch — the whole pot, top to bottom. The rhizomes hold weeks of water; soil that stays damp is soil that’s rotting them. If in doubt, wait another week. A ZZ will forgive the wait every time; it won’t forgive the opposite.
- Test deep, not shallow. A finger reads the top couple of inches, which dry first and lie to you. Push a wooden skewer or chopstick to the bottom of the pot: if it comes out with damp mix clinging, wait; if it comes out essentially clean and dry, you may water. The pot’s weight is the other honest gauge — a dry ZZ pot is startlingly light next to a watered one.
- Frequency follows light and season, not the calendar. In bright indirect light in spring and summer, many ZZs land around every 3–4 weeks. In winter, or in the low light these plants are famous for tolerating, 5–8 weeks between waterings is normal and correct — the plant barely drinks, so the soil barely dries. A dark-corner ZZ watered monthly on a bright-room schedule is being slowly drowned.
- When you water, water fully. Soak until it runs from the drainage holes, so the whole root ball and rhizomes actually take their share — then empty the saucer, every time, and never leave the pot standing in water. Half-measures and sips just wet the top and train the worst habits.
- Err dry. Underwatering a ZZ takes months of total neglect and announces itself slowly and reversibly. Overwatering can be quietly rotting the rhizomes while the plant still looks fine. Given a choice between watering today and next week, next week is the safer answer essentially always.
Translated into a rough seasonal calendar — always confirmed by the skewer test, never obeyed blind:
| Season / conditions | Typical rhythm (water only when fully dry) | Note |
|---|---|---|
| Spring — active growth | Every 3–4 weeks | The plant drinks most now |
| Summer — bright spot | Every 2–3 weeks | Heat and light dry the pot fastest |
| Fall — growth slowing | Every 4–5 weeks | Stretch the intervals as days shorten |
| Winter — or a low-light corner | Every 5–8 weeks | The rhizomes carry it — err on the dry side |
The asymmetry to remember: a ZZ can survive months of drought but only weeks of sogginess. When in doubt, wait another week.
Prevention: Keep the Bank Sound
- Pot and mix do half the work. Drainage hole, always; gritty, free-draining mix; a snug pot rather than a swimming pool of soil. Terracotta’s breathability is a genuine help for chronic overwaterers.
- Water by dryness, never by date — skewer test or pot weight, then soak, drain, and empty the saucer.
- Give it the light it loves, medium to bright indirect, and it will grow thick, glossy stems that resist problems — and drink on a predictable rhythm.
- Feed like you mean “barely.” Half-strength balanced fertilizer once or twice in the growing season is plenty; flush the pot with plain water once in a while to keep salts from building.
- Keep it warm and out of drafts — comfortably above 60°F, away from cold glass and vent blasts.
- Repot rarely and look while you do. Every couple of years, or when rhizomes deform the pot, repot one size up and take the free rhizome inspection the job offers you. Healthy rhizomes at a routine repot are the best news this plant gives.
- Quarantine the rescue rules: any ZZ that comes home from the store gets its first water only when the mix is dry — nursery soil often arrives saturated, and more new ZZs are lost in their first month home than in any year after.
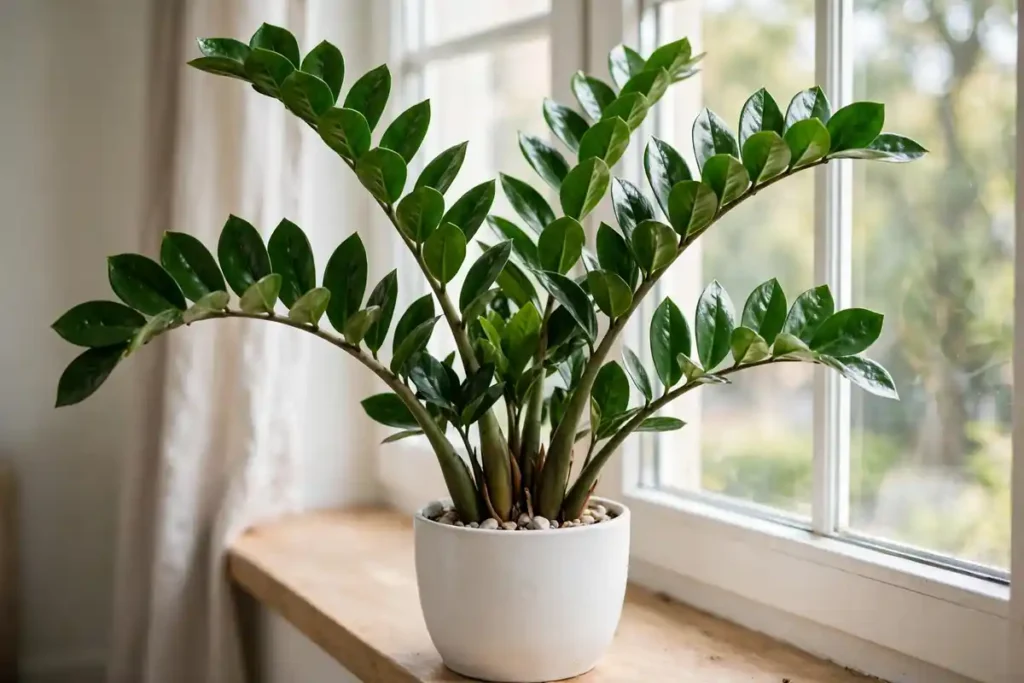
For the full everyday routine this prevention hangs on — light placement, potting, feeding, varieties, and propagation in depth — see our complete ZZ Plant Care Guide. And for the botanist’s-eye profile of the species itself, NC State Extension’s Zamioculcas zamiifolia profile is a solid, no-drama reference.
Triage: How Worried Should You Be?
Probably normal — tidy up and carry on:
- The single oldest stem yellowing slowly while new spears rise. Cut it off when it’s done.
- A leaflet or two yellowing on an otherwise firm, glossy plant. Snip them; review your rhythm.
- Pale new growth on a plant in a dark corner. It’s a light request, not an illness.
Act this week:
- Several stems yellowing, pot staying heavy, soil still damp a week after watering. Run the level-1 squeeze test and plan the unpot.
- Crispy yellow on a bone-dry, feather-light pot. Water deeply today and reset the schedule.
- Yellowing that started after a feeding routine began. Flush the pot; halve the feeding.
Act today:
- Any stem base that’s soft, a stem that pulls out with a gentle tug, sour-smelling soil, or a plant leaning or collapsing. That’s rot, and the rescue protocol is written for this afternoon.
- Whole-plant yellowing right after a hard freeze exposure — unpot, cut away dead tissue, and check what’s left of the rhizomes.
Frequently Asked Questions
Will my ZZ plant’s yellow leaves turn green again? No. Once a leaflet or stem has yellowed, that tissue is finished — the plant has withdrawn what it could from it. Remove fully yellow stems at the base and individual yellow leaflets as they appear, and judge your fixes by the new growth, not by the old leaves.
Should I cut off yellow ZZ stems, or leave them? Cut fully yellow stems off cleanly at the base with clean scissors — they’re done, and leaving them only hides the plant’s real condition. A stem that’s only lost a leaflet or two can stay; just snip the yellow leaflets. Don’t pull stems out by hand unless they come away with no resistance at all (which itself signals rhizome trouble underneath).
How do I know if my ZZ rhizome is rotten or just thirsty? Feel it. A rotten rhizome is soft, squishy or mushy, often dark and sometimes sour-smelling, and the problem arrives with damp soil and a heavy pot. A thirsty rhizome is firm but wrinkled and deflated, in a bone-dry, light pot. Firm is the dividing line: firm tissue can be thirsty, never rotten.
Can a ZZ plant recover from rhizome rot? Yes, if any firm rhizome survives. The rescue is mechanical: unpot, cut every soft, dark section back to firm pale tissue with a sterilized blade, let the cuts dry for a day or two, repot into fresh gritty mix, and restart on drought rules. Expect weeks to months before a new spear confirms the recovery — that’s normal for this plant.
How often should I water a ZZ plant? Whenever the mix has dried completely through the pot — check with a skewer pushed to the bottom, not by the calendar. In practice that’s often every 3–4 weeks in bright light in summer, and every 5–8 weeks in winter or low light. When in doubt, wait: a ZZ forgives late water far more easily than early water.
Why is only one stem of my ZZ plant turning yellow? Usually one of two stories. If it’s the oldest stem, yellowing slowly, while the rest of the plant is firm and growing, it’s natural retirement — cut it off when it’s fully yellow. If that stem’s base is soft or it pulls loose easily while its neighbors are firm, the rhizome section beneath it alone has rotted; unpot and check, because rot spreads to neighboring rhizomes if it’s left.
Are ZZ plants really okay in low light? They tolerate low light better than almost any houseplant — they’ll hold their looks in a dim corner for a long time. But tolerate isn’t thrive: in low light they grow very slowly, new growth comes in paler and thinner, and they drink so little that overwatering becomes easy. Medium to bright indirect light is where a ZZ actually flourishes.
My ZZ pot is bulging and the rhizomes are pushing out of the soil. Is that why it’s yellowing? It can be part of it. Rhizomes that have filled the pot leave almost no mix to hold water or nutrients, and the plant can yellow from the constraint even though ZZs prefer to be snug. Repot one size up into gritty mix — and use the unpotting to inspect the rhizomes while you have the chance.
Are ZZ plants toxic to pets? Yes — ZZ plants contain calcium oxalate crystals and are considered toxic if chewed by cats, dogs, or children, usually causing mouth and stomach irritation rather than anything life-threatening. Keep the plant out of nibbling reach, and call your vet or poison control if a pet actually eats a substantial amount.
Can I propagate a yellow ZZ stem or leaflet? A fully yellow stem, no — that tissue is spent, and yellow leaflets won’t root either. But healthy green stems and firm green leaflets from the same plant propagate well, just slowly: a leaflet can take 6–9 months to form its own little rhizome and sprout. Salvage propagation always uses the plant’s healthy parts, never the yellowed ones.
A yellowing ZZ plant feels like a betrayal from the one plant that promised to be easy. It isn’t, really — it’s the same plant, giving you its news the only way it can, from underground up. Read the pattern, feel the rhizomes, and believe what your fingers tell you: firm means the bank is sound and the fix is small; soft means surgery, today. And once you’ve got it back on drought rules, the ZZ goes right back to being what it always was — the plant that asks almost nothing of you, as long as the almost-nothing includes leaving the watering can alone.
2 Comments