Why Is My Aloe Vera Turning Brown? Read the Texture, Find the Cause, Save the Rosette
An aloe vera is the plant people buy when they’ve killed everything else. It sits on the windowsill for years asking for almost nothing — and then one morning the leaves are going brown, and it feels like a personal failure of a very specific kind: you couldn’t even keep the unkillable one alive.
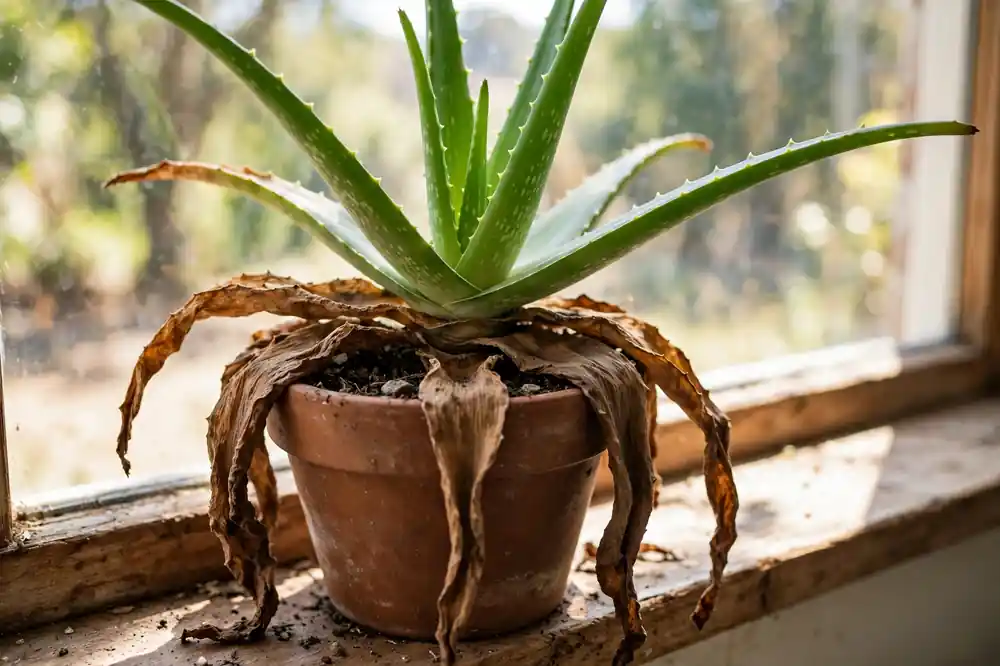
Before you do anything drastic, here’s the fast answer. Brown is an aloe’s stress color, and the single most useful thing about it is its texture. Soft, mushy, translucent brown means the plant has too much water in its system and may be rotting — that’s the emergency version. Dry, crispy, papery brown means the opposite end of the world: thirst, or sun that arrived too fast. And a plant that has taken on an even reddish-brown tint all over, leaves still firm, is usually neither — it’s wearing sunscreen, and it will fade back to green on its own.
So the whole diagnosis really starts with one gesture: pick up the plant and touch the brown part. What your fingers tell you in two seconds splits this guide in half. Mushy sends you to the rescue protocol further down, today. Crispy sends you to a watering can or a gentler windowsill. Firm and reddish sends you to the kettle — there’s genuinely nothing to fix.
One more thing to know before we start, because it shapes everything that follows: an aloe grows from the center of its rosette outward. The leaves browning today will never turn green again — no aloe leaf does that — but that’s not the verdict that matters. The verdict that matters is what’s happening in the center and at the base, and this guide will teach you to read both.
First, Read the Pattern: Where, How It Feels, What Shade
Aloes can’t tell you what happened to them, but the brown keeps a decent record. Read it on three axes before you touch a watering can.
Where is the brown? Tips only is the mildest postcode — the far end of the leaf is the oldest tissue and the first to complain about almost anything. Browning that starts at the base of the leaves, where they meet the stem, and creeps upward is the dangerous address; that’s where water sits and rot begins. Brown in the center of the rosette — the tight crown where new leaves spear up — is the most serious location of all. And brown spread over the whole plant at once usually means the whole plant experienced something: a move, a cold night, a week of fierce sun.
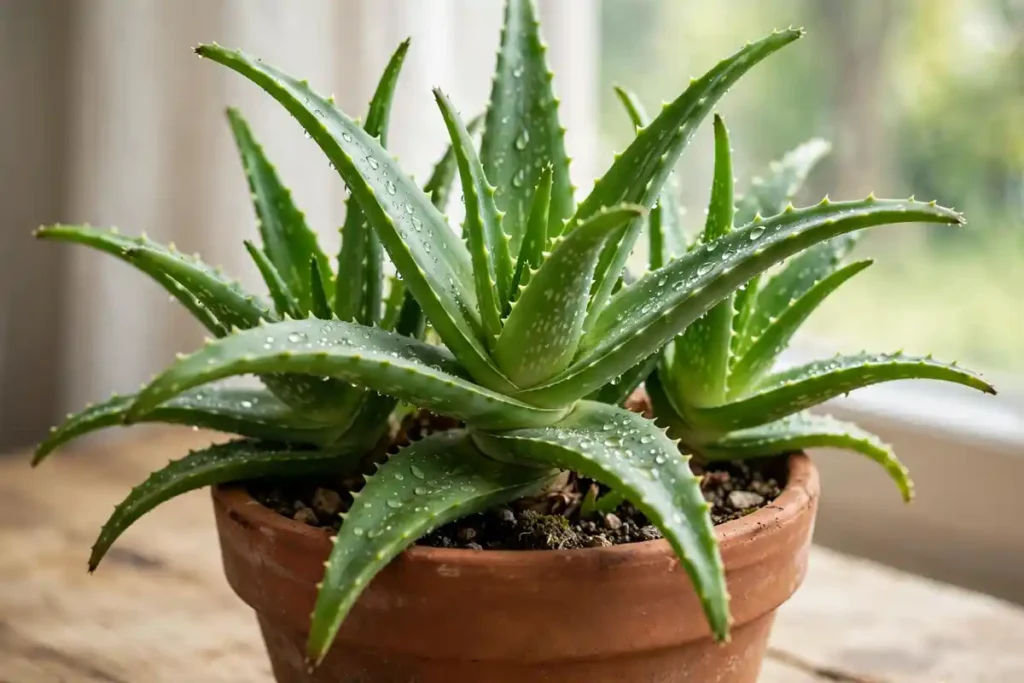
How does it feel? This is the axis that decides. A healthy aloe leaf is a water tank — plump and firm, almost turgid. Brown tissue that feels soft, that gives under your thumb like an overripe avocado, or that looks translucent and waterlogged, is tissue drowning from the inside. Brown tissue that feels dry, thin, and papery — the leaf gone leathery and wrinkled — is tissue that has run out of water or been scorched dry. And brown-ish tissue that is still completely firm and plump is, most of the time, not damage at all but pigment — the blush we’ll come to in Cause 3.
What shade is it? A reddish, coppery, or orange-brown tint, fairly even across the sun-facing leaves, is the plant’s own sunscreen — protective pigments it lays down when light gets strong. Dark brown going on black, especially anywhere soft, is dead and decaying tissue. Pale tan, bleached, papery patches are scorch: cells killed outright by sun. The shade and the texture together almost always agree, and when they do, so does the diagnosis.
Match your plant to the table:
| What you see | Most likely story | First move |
|---|---|---|
| Brown starting at the leaf bases, soft or mushy, plant wobbles in its pot | Overwatering / rot | Rescue protocol, today |
| Whole leaves soft, translucent, collapsing flat | Advanced rot | Rescue protocol, today |
| Brown, crispy tips on otherwise plump leaves | Mild thirst, salts, or sun stress | Check soil and feeding history |
| Leaves thin, wrinkled, curling inward, browning at edges | Underwatering | One deep soak |
| Even reddish-brown tint, leaves firm and plump | Sun-stress blush (normal response) | Nothing — or gentler light |
| Bleached, papery patches on the sun-facing side | Sunburn scorch | Shade now, acclimate slowly later |
| Brown, water-soaked patches after a cold night | Cold damage | Warmth, patience, trim the dead |
| Brown tips with white crust on the soil surface | Fertilizer / salt buildup | Flush the pot |
| Small round brown spots with yellow halos, scattered | Leaf spot / aloe rust (uncommon indoors) | Remove affected leaves, keep foliage dry |
Notice the shape of that table: the first two rows are the same story at different speeds, and they’re the only rows where today matters more than this week. Everything below them is a condition to correct, not a fire to put out.
The Four Checks: Five Minutes With Your Hands
Patterns narrow it down. These four checks — the same ones I’d run on any aloe brought to my door — usually close the case.
Check 1 — The squeeze test. Take a browned leaf between thumb and forefinger and press gently, the way you’d test an avocado. Plump and resistant is a living water tank. Soft, squishy, or deflating — especially near the base — is a tank that has burst its walls: the cells have collapsed and rot is in them. Then squeeze a leaf that’s still green. If the green leaves are plump while one outer leaf is soft and brown, you’re often looking at a single dying leaf. If the softness is in leaf after leaf, the problem is systemic and it’s in the pot.
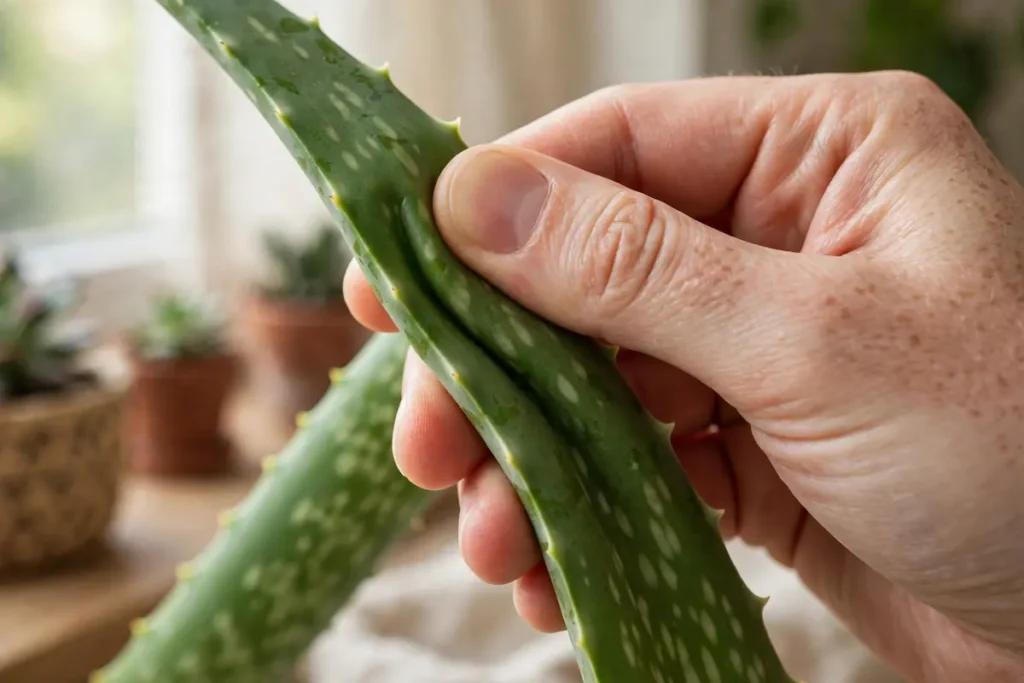
Check 2 — The base and the wiggle test. Put your fingers around the base of the rosette where the leaves converge, and press. It should feel like a firm fist of tissue. Softness, a darkened color at the base, or leaves that detach with a gentle tug are rot signatures. Then rock the whole plant very slightly: a healthy aloe is anchored by its roots and barely moves. One that wobbles or leans like a loose tooth has lost roots — or stem — to decay underneath.
Check 3 — The soil, deep. This is the tiebreaker for almost every argument in aloe care. Push a finger or a wooden skewer all the way to the bottom of the pot. What the surface looks like is nearly irrelevant; aloes live or die by what’s happening at root depth. If the mix at the bottom is still damp a week or more after you last watered, the roots have been sitting in water, whatever the top inch claims. Lift the pot while you’re at it. A waterlogged pot is heavy. A droughted one is startlingly light, and once your arm learns the difference you’ll diagnose half your plants by picking them up.
Check 4 — The smell test. Bring the pot close and sniff the soil and the base of the plant. Healthy potting mix smells like a forest floor — earthy, faintly sweet. A sour, swampy, rotten-egg smell is decay, full stop. It means anaerobic conditions and rotting tissue somewhere below the surface, and it overrules every other check: if it smells rotten, treat it as rot even if the leaves haven’t fully confessed yet.
If the squeeze test finds only firm tissue, the base is solid, the deep soil is dry, and nothing smells — then whatever brown you’re looking at is a sun, thirst, or age story, and the gentle sections below are yours. If any check finds softness at the base or that smell, skip ahead. Your section is the rescue protocol, and it’s written for this afternoon.
The Causes, One by One
In the order they actually show up in homes — which starts with the one that kills and works down to the ones that mostly embarrass.
1. Overwatering and rot — the killer
Almost every dead aloe I’ve ever seen died wet. The plant is a water-storage specialist from dry country: those fat leaves are reservoirs, built to carry it through months of drought. What it never evolved to survive is the opposite — roots sitting in saturated mix, week after week, in a pot indoors where nothing dries the way desert ground dries. Starved of oxygen, the roots start to die, and the organisms that live in every potting mix move into the dead tissue. From the roots, the rot climbs the short stem and into the leaf bases, and the leaves — cut off from everything, their own cell walls collapsing — turn that soft, translucent, darkening brown and begin to melt.
The signature is unmistakable once you’ve seen it: brown that starts low, at the leaf bases; leaves going soft and flat, sometimes pulling away from the stem at a touch; a plant that leans or wobbles; soil that’s still wet long after watering, sometimes with white mold fuzzing the surface or a drifting haze of fungus gnats — the two fellow travelers of a pot that never dries. And underneath it all, in any serious case, that sour smell.
Here’s the trap that finishes most of these plants off: an overwatered aloe wilts, and a wilting plant begs for water, and so a kind owner waters it again. The flat, collapsed look isn’t thirst — the leaves have lost their plumbing, not their supply. If the soil is wet and the plant looks thirsty, it is not thirsty. It is drowning.
How it happens is rarely one dramatic flood. It’s a rhythm slightly too generous for the conditions: a weekly watering schedule kept through winter, a pot with no drainage hole or a saucer never emptied, a heavy peat-based mix that holds water like a sponge, a plant moved to a dimmer corner where it drinks a third as fast while the watering stayed the same. Aloe is not the only water-storer that dies this way — the same wet-base failure is what turns succulent leaves mushy and falling off on echeverias and jades, and the rescue logic is shared across all of them.
The fix depends entirely on how far it’s gone. Caught early — one or two soft outer leaves, base still firm, roots not yet involved: stop watering completely, pull off the soft leaves, move the plant to your brightest spot, and let the pot dry out to the bottom and stay dry for a while. Many early cases steady themselves there. But if the base is soft, the smell is present, or leaves are collapsing in numbers, drying out is no longer enough — the rot is inside the plant’s tissues and it will keep traveling through wet or dry soil. That plant needs the rescue protocol below, and it needs it today.
2. Underwatering — the slow empty tank
The opposite failure takes real commitment to achieve, because an aloe is built to wait. But months of genuine neglect — a plant forgotten on a high shelf, a vacation that stretched, a pot that went a whole bright summer with nothing — will drain the reservoirs. The plant spends its own leaves: they thin out, wrinkle lengthwise, curl inward at the edges to protect themselves, and go dry and brown at the tips and margins. The rosette gets that pinched, closed-up look, like a fist clenching.
The texture gives it away every time, and it’s why the squeeze test matters so much: an underwatered aloe is dry. Its brown is crispy and papery, its leaves feel leathery and hollow rather than plump, the pot is feather-light, and the soil will be dry to the very bottom and often pulled away from the pot’s walls. There is no smell, and the base is perfectly firm. Nothing about it is soft, and softness is the whole difference between this cause and Cause 1.
The fix is the one pleasant job in this guide: water it properly. Set the pot in a basin and let it soak until the mix is wet through — parched mix can go water-repellent and let a top-watering sheet straight down the sides, so a half-hour bottom soak is the reliable route — then drain it completely and put it back in its bright spot. The leaves won’t all forgive you; tissue that has gone fully crispy is done. But a merely wrinkled, thirsty aloe re-plumps over the following week or two, and the new growth from the center comes in green. Then put it on the soak-and-dry rhythm from the prevention section so the tank never empties this far again.
3. Sun stress and sunburn — the blush is not the burn
This is the cause the internet gets most muddled, so let’s untangle it carefully, because an aloe will show you two completely different browns in strong light and they mean opposite things.
The blush. Move an aloe into brighter light — out onto a summer patio, or into a sunnier window — and within days the whole plant often takes on a reddish, coppery, orange-brown tint. The leaves are still plump and firm. Nothing is dying. What you’re seeing is the plant laying down protective pigments, the succulent equivalent of a tan: a deliberate stress response that shields the tissue while it adjusts its chemistry to the stronger light. Growers call it sun-stress coloring, and on many succulents people cultivate it on purpose. Left in the same light, the plant acclimates; given gentler light, the color fades back toward green over a few weeks. It is reversible because nothing was damaged — the cells are alive and pigmented, not dead.
The burn. Sunburn is what happens when the light increases faster than the plant can protect itself — the classic case being an aloe that wintered on a dim shelf carried straight out into full June sun. The tissue on the most exposed faces cooks before any pigment can save it. Scorched patches look different from the blush in every way: pale, bleached, almost white-tan rather than coppery; dry and papery or sunken rather than plump; confined to the sun-facing surfaces rather than tinting the whole leaf evenly. And unlike the blush, a scorch is a scar. That tissue is dead and it will stay exactly as it looks for the life of the leaf.
Telling them apart, then: even coppery tint + firm plump leaves = blush, relax. Pale bleached patches + dry thin texture on the sun side = burn, act. An aloe can, confusingly, do both in the same week — blush all over while its most exposed leaf-tips genuinely scorch — but the texture test sorts out any individual patch you’re worried about.
The fix for a burn is shade first, judgment later: move the plant into bright indirect light, leave the scorched leaves on (they’re ugly but the unburned parts still photosynthesize, and the plant will retire them in its own time), and if you want it back in strong sun — which a healthy aloe genuinely enjoys — reintroduce it gradually, an hour or two more direct sun every few days over a couple of weeks. For the blush, the fix is nothing at all, unless the color bothers you, in which case a slightly gentler spot will green it back up. What you should not do is what frightened owners do: retreat the plant to a dark corner permanently, where it will stretch, pale, and become far easier to overwater. More aloes are ruined by the cure for sunburn than by sunburn.
4. Cold damage — the night it got too cold
Aloe vera is a warm-climate plant with essentially no frost tolerance, and its comfort floor is higher than most people guess: it sulks below about 55°F and takes real damage below 50°F. The classic stories are the plant left on the patio for the first frosty night of fall, the one pressed against a cold windowpane through a January cold snap, and the one parked in the blast of an air-conditioning vent all summer.
Cold-damaged tissue has its own look: the cells freeze or chill-rupture and the leaf goes soft and water-soaked, darkening to brown or near-black in patches that often start at the tips and the most exposed outer leaves. That softness makes it easy to confuse with rot — and the confusion matters, because the causes and prognoses differ. The questions that separate them: was there a cold night in the last week or two? Is the soil dry rather than wet? Is the base firm and the plant still anchored? Cold damage plus dry soil plus a firm base is a plant that got chilled, not a plant that’s rotting. Its roots and crown are usually fine, and it will grow out of the damage.
The fix is warmth and restraint. Move the plant somewhere steadily warm, out of drafts and off cold glass. Don’t water it while it recovers — damaged tissue plus wet soil is how a chilled plant becomes a rotted one. Wait until you’re sure which tissue is truly dead (it will declare itself: soft, dark, collapsed) and cut only that away with a clean blade; leaves that are merely marked often carry on. Then patience — the rosette replaces damaged leaves from the center at its own slow pace.
5. Fertilizer burn and salt buildup — death by kindness, slowly
An aloe in a pot needs very little fertilizer — honestly, a dilute feed once or twice in the growing season is plenty, and many happy aloes get none at all. So the fertilizer problem is almost never hunger. It’s excess. Every feeding leaves salts behind; every watering with hard tap water adds a few more; and because an aloe is watered sparingly, there’s little flow through the pot to wash them out. The salts concentrate in the mix, the root tips and leaf tips — the far ends of the plumbing — suffer first, and you get the characteristic picture: dry brown tips creeping down from the ends of otherwise decent leaves, sometimes with a white crust crusting the soil surface or the inside of the pot rim.
The calibration here matters, because tip browning gets blamed on exotic water chemistry all over the internet — fluoride in the tap water is the fashionable villain. Can dissolved minerals contribute to tip burn over years? It’s possible, and a plant watered for a decade with very hard water may well show it. But in a normal home, brown tips are far more often plain thirst, a salt load from overfeeding, or a plant that’s simply root-bound and dry at the edges. Check your feeding habit before you blame the municipal water supply.
The fix is a flush: take the pot to the sink and run plain water through it slowly, several pot-volumes’ worth, letting it drain freely, to carry the accumulated salts out the bottom. Pour off everything that collects in the saucer. Then stop feeding entirely until the plant has put out a good round of new growth, and when you resume, feed at quarter strength, once or twice a year, in spring. If the crust is heavy and the mix is old, a repot into fresh gritty mix does the same job more thoroughly — and most aloes that have sat in one pot for years are due for it anyway.
6. Fungal leaf spots and aloe rust — real, but rarely the story
Last and least common indoors: the spots. A few fungal problems mark aloe leaves — leaf-spot fungi that produce small, round, sunken brown lesions, sometimes with yellow halos, and aloe rust, which shows as yellow-orange spots that darken to brown. South Dakota State University Extension’s aloe vera houseplant guide lists rust among the plant’s known diseases and notes the conditions that encourage it: cool temperatures and high humidity — which tells you most of what you need to know about how rare it is on a dry windowsill in a heated home.
Honesty cuts both ways here. These diseases exist, and a plant with spreading discrete spots, dry rather than mushy, on a plant whose base, soil, and smell all check out clean, may genuinely have one. But spots are the explanation people reach for when they’d rather not hear about their watering, and in a home, nine times out of ten — no, strike the invented number; let’s just say almost always — a brown aloe is a water, light, or temperature story. Rule out Causes 1 through 5 first. If spots remain the diagnosis: remove the worst-affected leaves with a sterilized blade and throw them in the trash (not the compost), keep water off the foliage, improve air movement, and let the plant grow out of it. A sound aloe fending for itself in dry air usually wins that fight on its own.
The Honest Verdicts: What Recovers, What Doesn’t, and What “Recovered” Looks Like
Most aloe advice dances around the prognosis. Here’s the undanced version.
A browned leaf never turns green again. Not the mushy ones, not the crispy ones, not the scorched ones. Once that tissue has browned, it is finished, permanently. Anything you do from here is about the plant’s future growth, not about restoring what’s already marked. Remove leaves that are fully dead or rotting — they help nothing and the rotting ones actively harm — but a leaf that is merely brown-tipped or blush-tinted can stay and keep working.
A mushy leaf is gone, and it should come off. Soft, translucent tissue is dead and decaying; left attached, it’s an open door for rot to walk into the stem. Cut it away cleanly at its base with a sterilized blade. This isn’t cosmetic — in a rot case it’s the treatment.
The rosette outgrows almost everything — if the crown is sound. An aloe’s whole future lives in the tight center of the rosette, the growing point where new leaves spear up. If that center is firm and pale-green, and the base below it is solid, the plant will recover from truly dreadful-looking damage: it will push new leaves from the middle, month by month, and gradually the wrecked outer leaves become the bottom of the plant and then history. This is why aloe rescue is so often worth attempting.
Rot in the crown is the one fatal verdict. If the softness and darkening have reached the center — if the heart of the rosette is mushy — that rosette is done, and no protocol in this guide or anywhere else brings it back. Say so, accept it, and look at the base of the plant: aloes pup. If there are offsets around the mother — and there often are — firm, green pups with roots of their own are the same plant, genetically, ready to pot up and carry on. Rescuers lose the rosette and keep the aloe. That’s not a consolation prize; it’s how the plant itself planned for this.
Recovery is measured in new leaves, over months. Aloe is a slow plant in health and slower in convalescence. After a rescue, the first sign that you’ve won is not the patient looking better — it’s a stop: no new leaves softening, no smell, the base firm when you check it weekly. The second sign is a new spear firming up in the center, and that can honestly take a month or two to arrive, and several more months to rebuild a handsome rosette. Anyone who promises you a fixed aloe in a fortnight is selling something. Judge your rescue at the three-month mark, by the center — never by the brown leaves, which were never going to change.
The Rescue Protocol: Saving a Rotting Aloe
For confirmed rot — soft leaf bases, a wobbling plant, that sour smell. This is the one protocol on the page where “today” means today, because rot travels through tissue while you deliberate.
- Stop watering and unpot the plant. Tip it out of its pot over newspaper. If it’s so loose it practically falls out, that tells its own story. Shake the old mix off the roots and stem base — all of it. In a rot case, that mix is part of the problem and none of it gets reused.
- Wash and look. Rinse the roots and the base gently so you can see true colors. Healthy aloe roots are thick, pale — white to light tan — and firm. Healthy stem tissue is pale and solid. Rot is none of those things: brown or black, soft, sometimes stringy or slimy, and it smells. Work your way up from the roots to the crown and take honest stock of how much of the plant is still sound.
- Cut away every trace of rot. With a sharp knife or scissors — wiped with rubbing alcohol before you start and again between cuts, because a blade that has passed through rot will inoculate the next cut — remove every soft leaf, every dark root, and slice the stem base back until the cross-section you’re looking at is uniformly pale, firm, and clean. This is the step people flinch on, and flinching is how rescues fail: rot left at the margin keeps eating. Cut back to healthy tissue even if it costs you most of the plant. A small sound aloe survives; a big half-rotten one doesn’t.
- Check the crown one last time. If the center of the rosette is firm and pale, proceed — you have a patient. If the rot has eaten into the heart itself, this rosette is finished; skip to step 8 and save the pups.
- Let the cuts callus. Set the trimmed plant somewhere dry, shaded, and airy — on a paper towel on a shelf, not back in a pot — for two to five days, until every cut surface has dried and sealed over. This drying is not a nicety; it’s the aloe equivalent of a scab, and it’s most of what keeps the rescued plant from rotting again in its new soil. A dusting of ground cinnamon on the cuts is a traditional optional extra; the callus is the part that matters.
- Repot into dry, gritty mix. A clean pot — scrub the old one or use a new one — with a drainage hole, terracotta if you have it, filled with a fast-draining mix: cactus/succulent mix, or regular potting soil opened up with roughly half perlite or pumice. Set the plant in dry mix, at its original depth, and firm it gently for stability.
- Withhold water. Do not water the rescue in. Wait at least a week — ten days won’t hurt it — while the roots begin to regrow into the mix. Then water once, thoroughly, drain completely, and from there run it on the prevention rhythm below: soak, then let it dry to the bottom, every time.
- If the crown is gone, save the pups. Separate any firm offsets, let any cut surfaces callus for a day or two, and pot them individually in the same gritty mix, waiting a week before their first light watering. Pups are not a replacement plant ordered from a catalog — they are this plant, continued.
- Bright indirect light, no fertilizer. Light fuels the rebuild; fertilizer salts burn tissue that’s regrowing roots. Feed nothing for at least a season. Your weekly job from here is only the base check: firm is winning, new softness is a relapse, and the center spear, when it comes, is the signature on the recovery.
This is, step for step, the same surgery that saves other rotting water-storers — a drooping snake plant with soft rhizomes gets the identical unpot-cut-callus-repot-dry treatment, and our guide to why a snake plant is drooping walks the same logic on that plant. Learn it once and you own the rescue for the whole succulent shelf.
One more rescue: beheading a base-rotted aloe. If the rot is in the stem base but the rosette above is still firm, you can behead the plant: cut the stem cleanly above the rot, back into firm, pale tissue; let the cut callus for 3–5 days in dry shade; then set the rosette in dry cactus mix and don’t water for the first week. Roots form from the stem over the following weeks while the rosette lives off its stored water. It’s a slow save, but aloes are built for exactly this kind of patience.
And check the base for pups. A thriving aloe produces baby offsets around its base — and on a plant you’ve just rescued, they’re the insurance policy and the next generation in one. Separate them properly:
- Wait until the pups are 3–4 inches tall with roots of their own.
- Unpot the whole plant and gently tease the pups away with roots attached; use a clean knife on stubborn connections.
- Let the cuts dry 1–2 days to callus — this is what keeps them from rotting.
- Pot each pup in dry cactus mix in a small terracotta pot.
- Wait 3–5 days before the first light watering.
One rule that matters: never separate pups from a stressed or rotting mother. Let her recover first — splitting a struggling plant just makes two struggling plants.
Prevention: The Routine That Makes This Page Unnecessary
An aloe that gets four things right almost never browns: a mix that drains, a pot that breathes, water given rarely and completely, and light introduced at the plant’s pace.
Mix and pot. Use a gritty, free-draining mix — a commercial cactus/succulent blend, or potting soil with about half perlite, pumice, or coarse sand worked through. Terracotta is the forgiving choice: it wicks moisture through its walls and dries the mix between waterings in a way plastic never does, which buys you margin for error. Whatever the material, a drainage hole is non-negotiable, and the saucer gets emptied every single time. A pot barely wider than the rosette is safer than a cavern of spare wet soil.
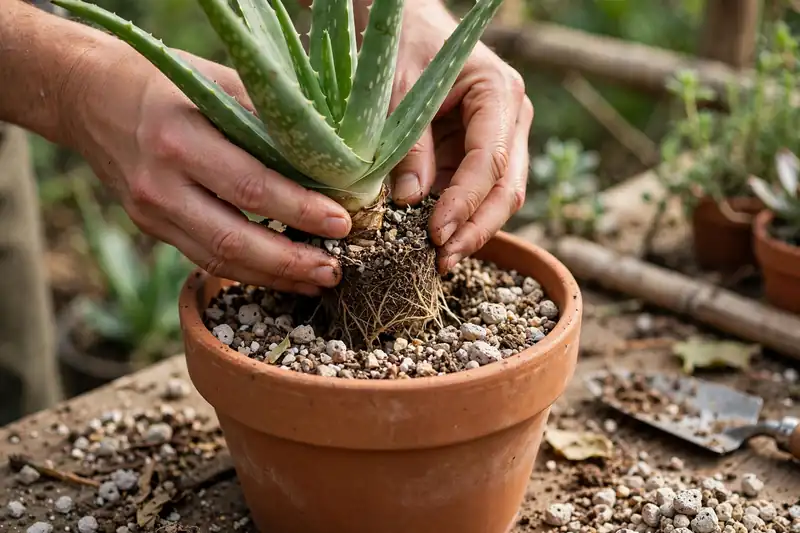
Watering: soak and dry, by check, not by calendar. When you water, water completely — until it runs from the drainage hole — so the whole root ball drinks. Then do not water again until the mix is dry all the way to the bottom, verified with the skewer or by the pot’s feather-weight, not by the date. In a bright spot in summer that often works out to every three weeks or so; in winter, or in lower light, five or six weeks between waterings is normal and correct. The calendar intervals are a sanity check, never the trigger. When in doubt, wait a week: this plant forgives late water essentially always and early water eventually never.
Light: bright, and arrived at gradually. Aloe wants the brightest light you have — several hours of direct sun is a pleasure to an acclimated plant, not a threat. The only rule is the staircase: whenever you move it to stronger light, step it up over one to two weeks. A plant that takes the stairs never scorches.
Feeding: barely. A quarter-strength balanced feed once or twice in spring covers an aloe’s needs for the year. If you never feed it at all, it will not be the reason it browns.
Temperature and air. Keep it comfortably above 55°F, bring outdoor plants in before nights flirt with 50°F, keep it off cold glass and out of vent blasts, and water at the soil — not into the rosette, where standing water in the crown invites exactly the rot this page is about. Wipe dust off the leaves now and then; a dusty aloe is a shaded aloe.
Triage: How Worried Should You Be?
Probably normal — tidy up and carry on:
- An even reddish-brown blush on firm, plump leaves after a move into brighter light. It’s sunscreen. Watch it fade or keep it, as you prefer.
- One oldest outer leaf browning and drying at the bottom of a growing rosette. That’s retirement, not disease — it comes off when it’s fully dry.
- Dry brown tips on a plant you know you forgot for a month. Soak it, forgive yourself, move on.
Act this week:
- Crispy browning spreading on a plant whose pot is bone-light and has been dry for weeks.
- Brown tips advancing while a white crust builds on the soil — flush the salts out.
- Bleached, papery patches after a sudden move into full sun. Shade it now, re-acclimate slowly.
- Spreading discrete spots on an otherwise clean-checking plant — remove the marked leaves and keep the foliage dry.
Act today:
- Any softness at the base of the rosette, leaves detaching at a touch, a plant wobbling in its pot, or a sour smell from the soil. That’s rot, and the rescue protocol above is written for this afternoon.
- A whole plant turned soft and dark after a freezing night — move it to warmth, keep it dry, and cut away the dead once it declares itself.
Frequently Asked Questions
Will my aloe’s brown leaves turn green again? No — browned tissue is finished, whatever caused it, and no watering change, feed, or spray reverses it. Judge every fix by the new growth spearing up from the center of the rosette, and remove leaves that are fully dead or soft so the plant’s real condition stays easy to read.
Should I cut the brown leaves off my aloe? Cut off the ones that are soft, mushy, or fully dead — in a rot case, removing them is part of the treatment, and it should be done with a clean blade at the leaf’s base. Leaves that are merely brown-tipped, crispy at the edges, or blush-tinted can stay; they’re still working for the plant, and it will retire them itself when they’re spent.
Can I still use the gel from a browned aloe leaf? From a firm leaf that browned from sun or thirst, yes — the gel inside is the same gel, and the browning was in the leaf’s skin and structure, not a change in the gel. But never take gel from a soft, mushy, translucent, or bad-smelling leaf: that tissue is rotting, and rotting plant matter doesn’t belong on skin, especially not on a burn. To harvest from a healthy leaf: cut a thick outer leaf close to the base of a mature plant, stand it cut-end down for a few minutes to drain, and rinse away the yellow latex that sits just under the skin — that latex (called aloin) is the irritant, not the clear gel. Take only a few leaves at a time, so the plant keeps its strength.
Why is only the tips of my aloe turning brown? Because the tip is the far end of the leaf’s plumbing and its oldest tissue, so it’s where shortages and excesses show first. The usual stories, in order: the plant is genuinely thirsty; salts have built up from feeding or hard water; or the pot is so root-bound there’s barely any mix left to hold moisture. Check the soil depth and your feeding history before anything exotic.
My aloe turned reddish-brown after I put it outside. Is it dying? Almost certainly not — that’s the sun-stress blush, the plant’s protective pigment response to stronger light, and it happens to healthy aloes within days of a move outdoors. If the leaves are firm and plump, you can leave it in place and let it acclimate (watching for any pale, papery scorch patches, which do mean too much too fast), or move it somewhere slightly gentler and watch the green return over a few weeks.
How long does a browning aloe take to recover? It depends on the cause, and aloe time is slow time. A thirsty plant re-plumps within a week or two. A sun-blushed plant greens back over a few weeks in gentler light. A rescued rot case needs a month or two just to prove it has stabilized — no new softening, base firm — and several months of new center growth before it looks like itself again. Score the recovery at three months, by the center of the rosette.
The center of my aloe is brown and soft. Is it dead? The rosette is, honestly — if rot has reached the crown, the growing point is gone and that rosette can’t recover. But check the base before you grieve: aloes commonly grow offsets, and firm green pups can be separated, callused, and potted up. The plant you lose is one rosette; the plant itself very often continues.
How often should I water an aloe vera? Whenever the mix has dried completely, top to bottom — check with a skewer pushed to the bottom of the pot or by the pot’s light weight in your hand, never by the calendar alone. In a bright home that commonly lands around every three weeks in summer and every five to six in winter, but the soil’s dryness is the schedule. When you do water, soak it thoroughly and drain it fully.
My aloe fell over — the base rotted through. Can I replant it? Yes, if the rosette itself is still firm: behead it. Cut the stem above the rot into firm tissue, let the cut callus for 3–5 days, plant it in dry cactus mix, and don’t water for a week. The rosette will root from the stem over the following weeks — and check the old base for pups before you compost it.
How long do aloe vera plants live? Indoors, 5–12 years is typical for a single rosette — but with repotting and pup division, one genetic line can continue indefinitely. Many “ancient” aloes are really the great-grandchildren of the original plant, living in the same pot.
A browning aloe feels like a verdict on the one plant that promised to be effortless. Read it differently: it’s the plant filling out a report, in a hand you now know how to read. Soft means wet, and wet means today. Crispy means thirsty or scorched, and both forgive easily. Firm and coppery means the plant is handling its own business and would like you to handle yours. Feel the leaves, trust your fingers, and give the center of that rosette time to tell you the ending — on an aloe, the ending is almost always better than the middle looked.