
How to Get Rid of Spider Mites on Houseplants
You’ve probably had that moment: your calathea looked perfect last week, and now the leaves are speckled with tiny pale dots, the green looks dull and dusty, and — is that fine webbing where the leaf meets the stem? Congratulations, you’ve joined the club nobody wants to be in. If you want to know how to get rid of spider mites on houseplants, you’ve come to the right place, because I’m about to walk you through exactly what worked for me after these tiny monsters nearly took out half my collection.
Here’s the thing most guides won’t tell you upfront: spider mites aren’t actually insects. They’re arachnids — tiny relatives of spiders and ticks — which matters because it changes what kills them. And they’re not like fungus gnats, where you see the little flies and think “ah, that’s the problem.” Spider mites are nearly invisible until the damage is obvious, by which point a single leaf can be hosting hundreds of them. The good news? With the right approach, they’re very beatable. The bad news? Half the advice online stops at “spray neem oil once,” and that single half-measure is exactly how infestations come roaring back.
This guide is the full playbook: how to confirm you actually have spider mites (and not something else), the seven-step treatment plan that works, homemade neem and insecticidal soap recipes, the rotation strategy that prevents resistant super-mites, what to avoid, and how to make sure they never come back. I’ve battle-tested all of this in my own sunny apartment where the winter heating turns the air into a spider mite paradise.
In This Guide
- What spider mites actually are (and why that matters for treatment)
- How to identify spider mites: stippling, webbing, and the white-paper tap test
- Why spider mite populations explode indoors
- The 7-step spider mite treatment plan that actually works
- Neem oil recipe for spider mites
- Insecticidal soap recipe and the rosemary oil option
- Why you MUST rotate treatments (the resistance problem)
- What NOT to do: why broad-spectrum insecticides make things worse
- The 6-week monitoring rule most guides skip
- Prevention: humidity, quarantine, and inspection routines
- Plants most susceptible to spider mites
- FAQs
What Spider Mites Actually Are (And Why That Matters)
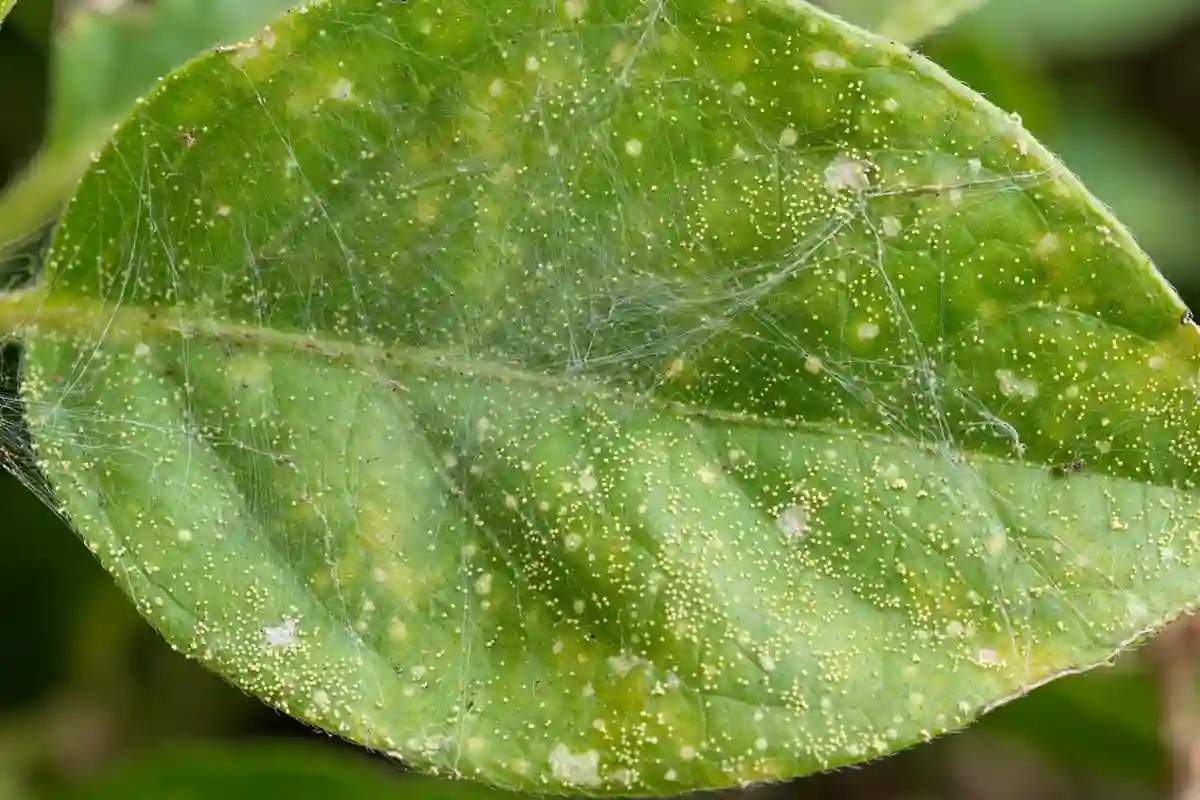
The culprit on houseplants is almost always the two-spotted spider mite (Tetranychus urticae), a mite barely 0.5 millimeters long — about the size of the period at the end of this sentence. They get their name from the two dark spots visible on either side of their pale green, yellowish, or orange bodies (best seen with a hand lens). And because they’re arachnids with eight legs rather than insects with six, many conventional insecticides don’t touch them — or worse, backfire, as I’ll explain later.
What makes them formidable is their life cycle. In warm indoor conditions — say 75–80°F, which is exactly what your heated living room offers — spider mites can go from egg to reproducing adult in as little as one week. Each female can lay 100+ eggs in her short lifetime. Do the math and you’ll see how a few invisible hitchhikers become a colony of thousands in a month. They reproduce fastest in hot, dry, dusty conditions and on plants that are water-stressed or over-fertilized with nitrogen (which makes leaves softer and more nutritious to mites).
Unlike many pests, spider mites spread by drifting — they balloon on air currents, hitch rides on clothing and pets, and crawl leaf-to-leaf between touching plants. They can’t fly, but they’re surprisingly mobile at the scale of a houseplant collection. This is why quarantine matters so much, and why treating one plant while ignoring its neighbors usually fails.
How to Identify Spider Mites: Stippling, Webbing, and the Tap Test
Before you treat anything, confirm the diagnosis. Spider mite damage has a signature look:
- Stippling — hundreds of tiny pale dots on leaves, as if someone airbrushed the leaf with white paint. This is feeding damage: mites pierce individual cells and suck out the contents. Early damage looks like faint speckling; severe damage turns whole leaves yellow or bronze, and eventually they drop.
- Fine webbing — silky threads on the undersides of leaves, at leaf joints, and between stems. This is the late-stage sign. A plant with visible webbing has been hosting mites for weeks.
- Dusty, dull leaves — the leaf surface looks matte and grayish rather than glossy green, often with tiny moving dots if you look very closely.
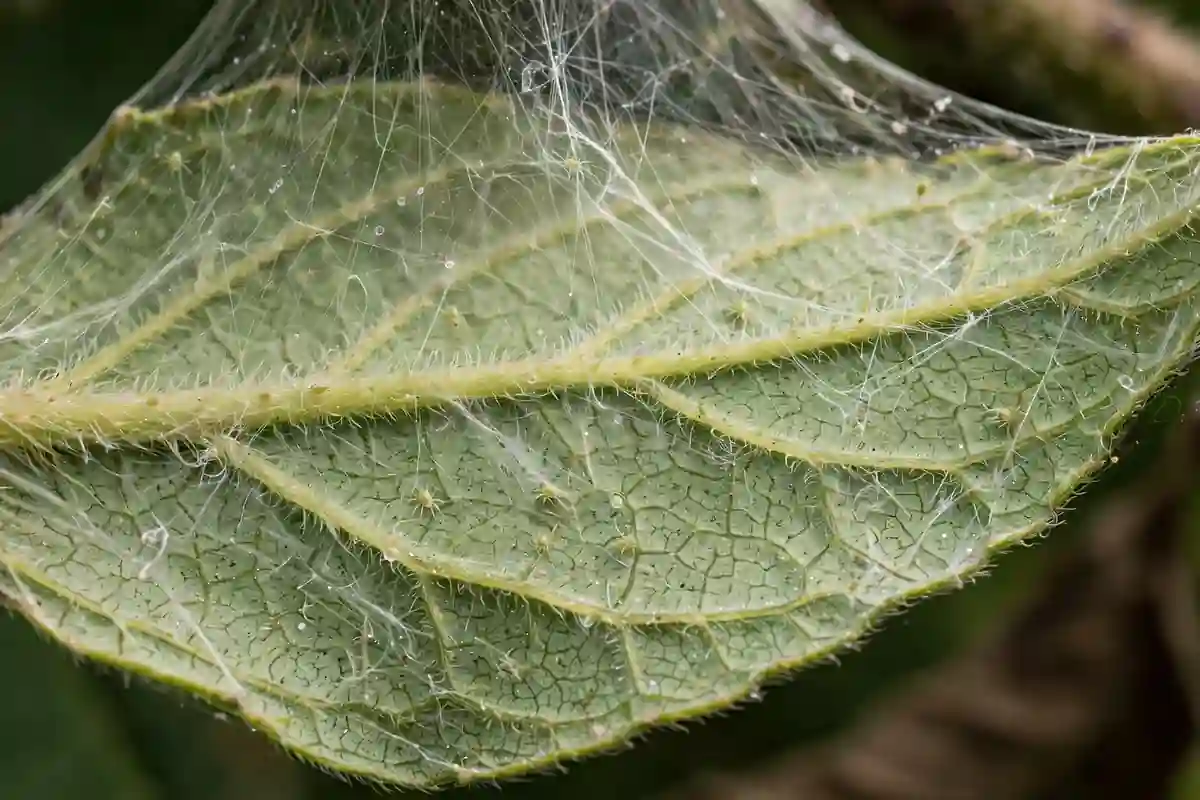
The definitive at-home test is the white-paper tap test: hold a white sheet of paper under a suspect leaf, tap the leaf firmly a few times, then watch the specks that fall. If the tiny dots start crawling across the paper — congratulations, you’ve got spider mites. They’ll smear reddish-brown if you crush one, which is another confirmation (that reddish smear is their body fluid).
One common misdiagnosis: dust vs. mites. Houseplants accumulate real dust, and dusty leaves look dull too. But dust wipes off in a uniform gray film; mite stippling is in the leaf tissue itself and doesn’t wipe away. If wiping the leaf with a damp cloth restores the green, it was just dust. If the speckles stay, grab your white paper.
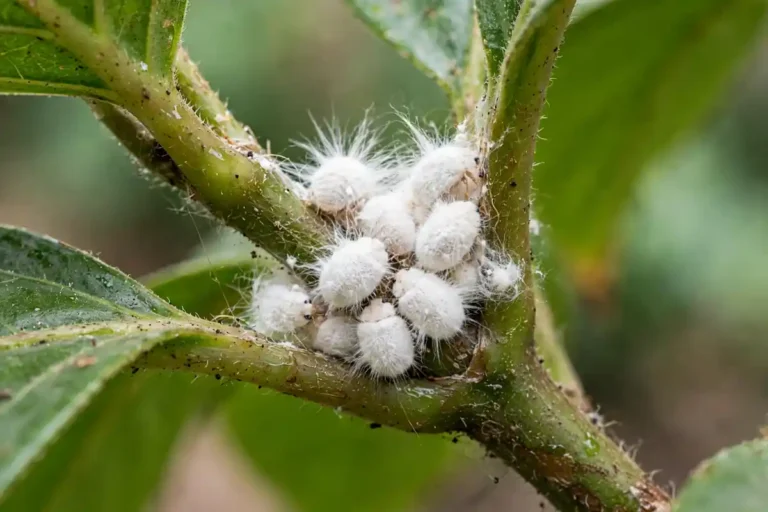
Also rule out other pests: mealybugs on houseplants leave cottony white clusters, not stippling. Thrips leave silvery scratch-like scars. Spider mite stippling is distinctively even, tiny dots — remember that pattern.
Why Spider Mite Populations Explode Indoors
Your house is essentially a spider mite paradise, and understanding why helps you fight them:
Warm and dry year-round. Mites thrive at 70–80°F with low humidity. Winter heating drops indoor humidity to 15–30%, which is ideal for mites and terrible for plants. One female laying eggs in these conditions can found a colony that doubles every few days.
No predators. Outdoors, predatory mites, ladybugs, lacewings, and thrips keep spider mite numbers in check. Indoors, your plant is a predator-free buffet. This is actually a strong argument against blasting plants with broad-spectrum insecticides — you’d be killing the few helpful organisms present while the mites, which reproduce faster, bounce right back.
Dust and drought stress. Dusty leaves give mites shelter and hiding spots. Drought-stressed plants have higher concentrations of amino acids in their sap, which mites love. The chronically underwatered plant in the dry corner is always the first casualty.
Over-fertilizing. Heavy nitrogen feeding pushes soft, lush growth that’s easier for mites to feed on. If you’re aggressively fertilizing while an infestation brews, you’re literally feeding the enemy. During treatment, cut the fertilizer.
Close quarters. Plants touching each other let mites walk from leaf to leaf. The crowded windowsill jungle that looks so good on Instagram is a mite superhighway.
The 7-Step Spider Mite Treatment Plan
This is the core of the guide. Don’t skip steps — every part of this plan exists because mites exploit the weakness of partial treatment. Here’s exactly how to get rid of spider mites on houseplants:
Step 1: Isolate the Infested Plant
Move the affected plant away from all others — a different room if possible. Check every neighboring plant with the white-paper tap test, because plants that were touching the infested one are probably infested too. Treat everything that’s touching, even if damage isn’t visible yet. Inspect the isolation setup so leaves don’t touch walls or other plants.
Step 2: Blast Them Off With Water
Take the plant to the shower, sink, or outside and rinse it thoroughly with a strong stream of water, focusing on the undersides of every leaf. This single mechanical step can physically remove the majority of mites, eggs, and webbing in minutes. Hold the pot at an angle so water doesn’t flood the soil (cover the soil with plastic wrap or a bag if needed).
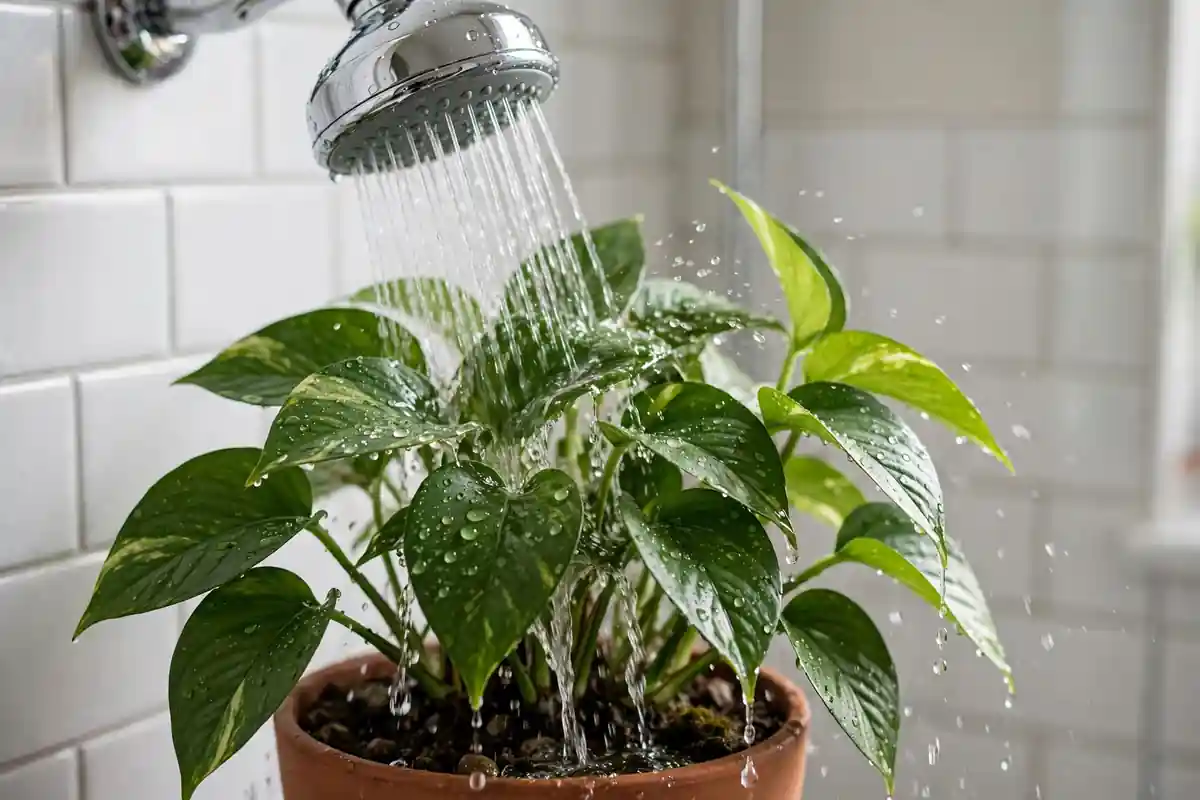
Water blasting is underrated because it seems too simple. But UC IPM’s own guidance lists frequent washing of leaf surfaces among the first-line controls for mites — it works by sheer physical removal, and mites can’t develop resistance to it.
Step 3: Wipe Every Leaf
After rinsing, wipe both sides of every leaf with a damp cloth or sponge. This removes webbing (which protects eggs from sprays), crushes survivors, and lets you physically inspect the whole plant. For plants with many small leaves, this is tedious — do it anyway. Webbing left in place will shield mite eggs from whatever you spray next.
Step 4: Apply Your First Treatment Spray
Choose one of the sprays in the recipes below (neem oil or insecticidal soap) and coat the plant thoroughly — top and bottom of every leaf, stems, and leaf joints. Underside coverage is non-negotiable; that’s where the mites live. Spray in the evening or move the plant out of direct sun afterward, since wet leaves in strong light can burn.
Step 5: Raise the Humidity
Mites hate humidity. Move the plant to a more humid spot, group it with other plants (after they’ve all been treated), run a humidifier nearby, or set it on a pebble tray with water. Aim for 50%+ relative humidity around the plant. This won’t cure an infestation alone, but it dramatically slows mite reproduction between treatments.
Step 6: Repeat Every 3–5 Days for 3–4 Weeks
This is where most people fail. A single spray kills adults and nymphs but does not reliably kill eggs — and those eggs hatch in 3–7 days. The repeat cycle is timed to kill each new generation of hatchlings before they can lay their own eggs. Mark your calendar: spray days on a strict 3–5 day rotation, for a minimum of three to four weeks. Miss a week and the survivors rebuild.
Step 7: Monitor With the Tap Test Weekly
After the intensive treatment month, switch to weekly white-paper tap tests for at least six more weeks (more on this critical rule below). Mites you can’t see are still mites.
| Phase | Duration | Action |
|---|---|---|
| Knockdown | Days 1–3 | Isolate, rinse, wipe, first spray |
| Active treatment | Weeks 1–4 | Spray every 3–5 days, rotate products |
| Monitoring | Weeks 5–10 | Weekly tap tests, spot-treat any survivors |
Neem Oil Recipe for Spider Mites
Neem oil is the workhorse of houseplant pest control. Its active compound, azadirachtin, disrupts mite feeding and reproduction rather than just poisoning on contact — mites stop feeding, fail to molt, and stop laying viable eggs. It’s also a mild repellent, so treated leaves become less attractive.
My go-to neem spray recipe:
- 1 quart (about 1 liter) of warm water
- 1–2 teaspoons of cold-pressed neem oil (not “neem extract” — you want the full oil with azadirachtin)
- 1/2 teaspoon of mild liquid soap (pure castile soap, not detergent or dish soap with degreasers)
Mix the soap into the warm water first, then add the neem oil and shake vigorously. The soap emulsifies the oil so it mixes with water instead of floating. Pour into a spray bottle and use within 8 hours — neem breaks down quickly once mixed.
Application tips that matter:
- Spray until the plant is dripping, covering every surface. Undersides first.
- Apply in the evening. Neem + direct sun = leaf burn risk.
- Always spot-test one leaf and wait 24 hours before full application, especially on ferns, palms, and plants with delicate foliage.
- Shake the bottle constantly while spraying — the emulsion separates.
- Don’t use neem on a plant that’s drought-stressed; water it first and wait a day.
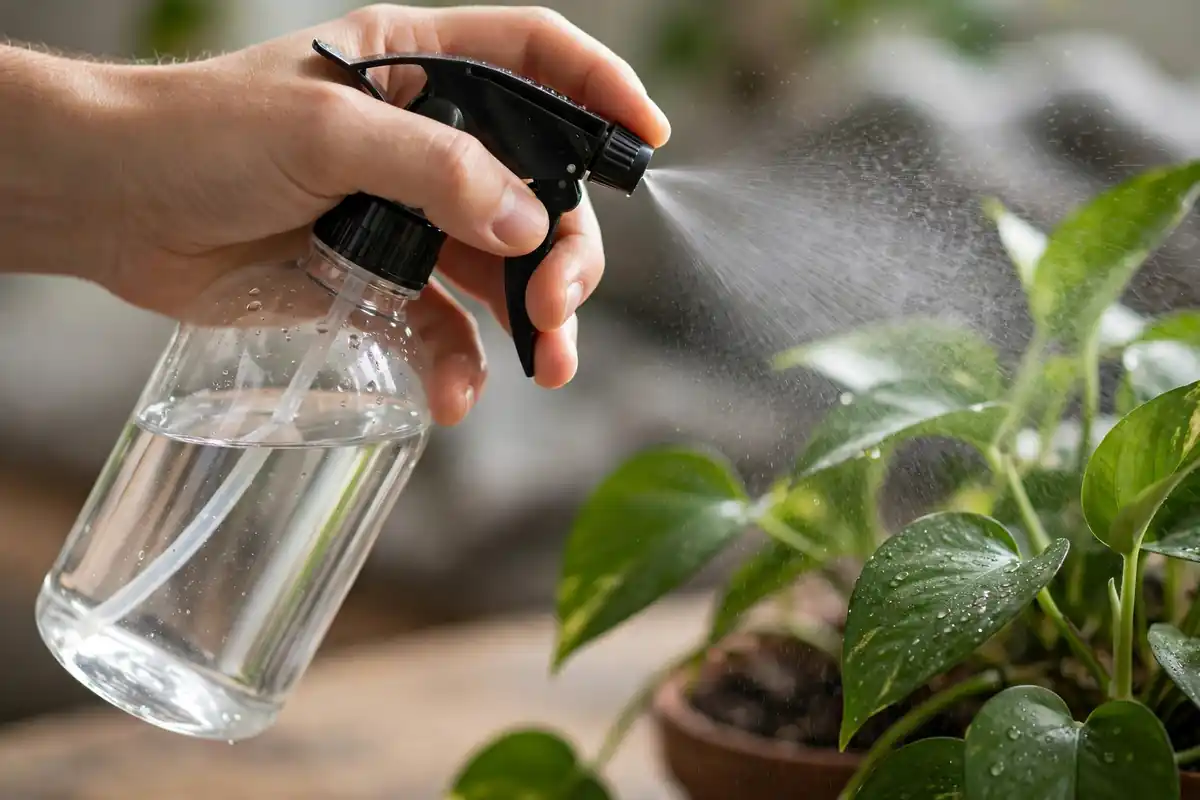
Neem is not an instant knockdown — it works over days as mites feed on treated tissue and fail to reproduce. That’s why the repeat schedule is essential. If you want faster visible results, insecticidal soap (below) kills on contact and pairs perfectly with neem in a rotation.
Insecticidal Soap Recipe and the Rosemary Oil Option
Insecticidal soap kills mites on contact by breaking down their cell membranes — they dehydrate and die within hours. It has no residual effect, which is both its weakness (eggs survive) and its strength (no chemical buildup, safe around the house).
Homemade insecticidal soap recipe:
- 1 quart of water
- 1 tablespoon of pure liquid castile soap (Dr. Bronner’s unscented is the classic choice)
- Optional: 1 teaspoon of vegetable oil to help it stick to waxy leaves
Mix gently, spray thoroughly, and rinse the plant with plain water after 1–2 hours to prevent soap buildup and leaf damage. Like neem, apply in the evening and spot-test first. Never use dish detergent — degreasers strip the leaf’s protective cuticle and cause more damage than the mites.
The rosemary oil option: rosemary essential oil contains compounds that are genuinely acaricidal (mite-killing). Add 10–15 drops of pure rosemary essential oil per quart of your soap spray, shake well, and apply the same way. Studies have shown rosemary oil effective against two-spotted spider mites specifically, and it smells far better than neem (which has a famously garlicky, nutty odor your family will notice). I rotate rosemary-soap spray in as my third product — more on rotation next.
| Treatment | Kills on contact? | Kills eggs? | Residual action | Smell factor |
|---|---|---|---|---|
| Water blast | Yes (removes) | Partially | None | None |
| Insecticidal soap | Yes | No | None | Mild |
| Neem oil | Slowly | Reduces hatching | 5–7 days | Strong |
| Rosemary oil spray | Yes | Partially | 2–3 days | Pleasant |
Why You MUST Rotate Treatments (The Resistance Problem)
Here’s the SERP gap that almost nobody talks about: spider mites develop resistance to pesticides astonishingly fast. Because a generation turns over in a week and each female lays hundreds of eggs, any mites that survive a treatment pass on their resistance genes immediately. Greenhouses worldwide battle miticide-resistant spider mite strains — and home growers create the same problem by spraying the same product week after week.
The fix is simple: rotate between at least two, ideally three, different modes of action. My rotation looks like this:
- Spray 1: Insecticidal soap (contact killer — membrane disruption)
- Spray 2 (3–5 days later): Neem oil (growth regulator — azadirachtin)
- Spray 3 (3–5 days later): Rosemary oil soap spray (botanical acaricide)
- Repeat the cycle
Each product kills by a different mechanism, so mites resistant to one are still vulnerable to the others. Never use the same single product more than twice in a row. This is the same resistance-management principle commercial agriculture uses, scaled down to your living room.
One more resistance note: this is also why you keep the water blasts and leaf wiping in the rotation — mechanical removal is a “mode of action” that mites can never evolve around. Alternate a plain water rinse between chemical sprays and you’ll both reduce the population and cut your product use.
What NOT to Do: Broad-Spectrum Insecticides Make It Worse
This is counterintuitive but critical: most conventional insecticides don’t kill spider mites, and many cause mite populations to explode. UC IPM’s spider mite guidance specifically warns that applications of carbaryl or pyrethroid insecticides (like permethrin) to control other pests are frequently followed by mite flare-ups. Two reasons:
- Mites aren’t insects. Many insecticides target insect nervous systems; mites, as arachnids, are often unaffected. You spray, the mites shrug.
- You kill the predators. Whatever predatory mites, lacewings, or other beneficial organisms were quietly eating your spider mites just died. The mites — untouched by the spray — now reproduce with zero predation. The result is a worse infestation than you started with. Entomologists call this a pest resurgence or “mite flare-up.”
So skip the all-purpose bug sprays, the systemic granules marketed for “houseplant pests,” and anything with permethrin, bifenthrin, or carbaryl when mites are the target. Stick with the targeted, low-impact tools: water, soap, neem, horticultural oil. Save the heavy chemistry for situations where an extension specialist actually recommends it — the University of California’s IPM program has detailed spider mite guidance confirming this predator-friendly approach.
Also avoid: fertilizing during treatment (feeds the mites), mist-only “treatment” (a light mist doesn’t dislodge anything — you need drenching force), and treating only the visibly damaged leaves (mites are always ahead of the visible damage).
The 6-Week Monitoring Rule Most Guides Skip
You finished your month of sprays. The plant looks great. The tap test is clean. You’re done, right?
Not yet. Here’s why: spider mite eggs can survive in tiny crevices — where the leaf meets the stem, in bark crevices, on the pot rim — and hatch over an extended period. A single surviving egg mass can restart the whole infestation, and at warm indoor temperatures it takes only about two weeks to go from “a few hatchlings” to “visible damage.”
The rule: after your last scheduled spray, keep doing the white-paper tap test every single week for at least six weeks. Put a recurring reminder on your phone. If any test comes back positive, restart a two-week spray cycle immediately — catching a resurgence at ten mites is infinitely easier than at ten thousand.
During monitoring, also watch for the early-warning signs: a return of faint stippling on new growth, leaves losing their gloss, fine webbing at leaf axils. New growth is the canary — mites prefer tender new leaves, so inspect those first every week.
And quarantine discipline during monitoring: keep the recovered plant separated from your main collection until it passes the full six weeks clean. I’ve seen people reintroduce a “cured” plant at week three and lose three more plants to the resurgence. Patience is the whole game.
Prevention: Keeping Spider Mites Away for Good
Winning the battle means nothing if you lose the peace. Here’s the prevention routine that keeps my collection mite-free:
Humidity is your best defense. Mites reproduce slowest above 50–60% relative humidity. Run a humidifier in your plant room through winter, group plants together (raises local humidity), and use pebble trays. If your winter indoor humidity sits at 20%, you’re running a mite incubator.
Quarantine every new plant — no exceptions. New plants sit in a separate room for 2–3 weeks minimum before joining the collection. Inspect undersides of leaves with a hand lens, do the tap test twice during quarantine. Most indoor mite infestations start with a new plant that “looked fine at the store.”
Inspect weekly, treat monthly. Make leaf inspection part of your watering routine — flip a few leaves, look at undersides. Once a month during the dry season, give susceptible plants a preventive shower rinse. It takes five minutes and removes mites before they establish.
Reduce dust. Dusty leaves are mite habitat. Wipe large-leafed plants monthly with a damp cloth. Clean leaves photosynthesize better anyway — it’s free plant care with pest control as a bonus.
Water properly and fertilize moderately. Drought-stressed, over-fertilized plants are mite magnets. Keep up a consistent watering routine (check out my guide to pothos care for the finger-test method that works for most houseplants) and don’t push heavy nitrogen feeds, especially in winter.
Space plants out. Leaves touching = mite bridges. A little airflow between plants also reduces the still, dusty microclimate mites love.
Plants Most Susceptible to Spider Mites
Some plants are mite magnets while others rarely have trouble. If you grow the high-risk ones, inspect them first and most often:
| Risk level | Plants | Why they’re vulnerable |
|---|---|---|
| Very high | Calathea/maranta, ivy, croton, palms (parlor, majesty), schefflera | Thin leaves, love the warm dry air mites love, dense foliage |
| High | Fiddle leaf fig, dracaena, philodendron, dieffenbachia | Large leaf surface area, common in dry indoor spots |
| Moderate | Pothos, spider plant, ZZ plant, snake plant | Thicker leaves resist feeding; infestations slower to establish |
| Low | Succulents, cacti, ferns (high humidity) | Thick cuticles or humidity needs that suppress mites |
Note that “moderate risk” doesn’t mean immune — a stressed pothos in a dry, dusty corner will absolutely get mites. It just means healthy specimens in decent conditions usually fight them off. If your dracaena has brown tips AND stippling, suspect mites compounding a watering issue — the two problems love to co-occur.
Also watch fiddle leaf figs with yellowing leaves — mite stippling is often misdiagnosed as a watering or light problem on fiddles, and people repot and fuss while the mites keep feeding. Always tap-test before you repot.
Frequently Asked Questions
Do the white-paper tap test: hold white paper under a leaf, tap firmly, and watch for crawling specks. Spider mite damage looks like hundreds of tiny pale dots (stippling) evenly spread across the leaf — it doesn’t wipe off like dust. Fine silky webbing on leaf undersides is a late-stage confirmation. If you see cottony white clusters instead, those are mealybugs; silvery scratch marks suggest thrips.
There’s no one-spray permanent cure — permanence comes from the system. Isolate the plant, rinse and wipe all foliage, then spray every 3–5 days for 3–4 weeks, rotating between insecticidal soap, neem oil, and a botanical oil spray to prevent resistance. Follow with six weeks of weekly tap-test monitoring. Then keep humidity above 50% and quarantine new plants. Plants stay mite-free when the conditions stay mite-hostile.
Yes, easily. They crawl across touching leaves, drift on air currents, and hitchhike on your hands and clothing while you tend plants. That’s why isolation is step one of any treatment plan, and why you should tap-test every plant that was near the infested one. Treat the neighbors proactively — by the time you see damage on them, they’ve been infested for weeks.
Neem oil suppresses and eventually eliminates spider mites, but it’s slow — it disrupts feeding and reproduction rather than killing on contact, and it doesn’t reliably kill eggs. Used alone with a single application, it almost always fails. Used correctly — thorough coverage, repeated every 3–5 days for a month, rotated with a contact killer like insecticidal soap — it’s excellent. Think of neem as the long game, not the knockout punch.
Plan on 4–6 weeks of active treatment plus 6 weeks of monitoring — roughly three months from discovery to confident clearance. The active phase (spraying every 3–5 days) runs 3–4 weeks to outlast the egg-hatch cycle. Rushing this timeline is the number one reason infestations rebound. Mite eggs are the enemy’s reserve army; your schedule has to outlast them.
No. Spider mites are plant feeders — their mouthparts are designed to pierce plant cells, not skin. They may crawl on you while you handle an infested plant, which feels creepy, but they can’t bite you, your kids, or your pets. The only damage they do is to your plants (and your peace of mind).
Sometimes, honestly, yes. If a plant is heavily infested — most leaves bronzed, webbing everywhere, dropping foliage — and it’s a common, inexpensive plant, discarding it (sealed in a bag, straight to outdoor trash) can be smarter than a two-month treatment campaign that risks your whole collection. Save the heroic efforts for rare or beloved plants. There’s no shame in triage; even professional growers cull.
Alcohol works on contact for the mites it touches, but it’s impractical as a primary spider mite treatment — you’d have to swab hundreds of microscopic mites individually, and alcohol evaporates before it reaches eggs hiding in webbing. Save the alcohol swabs for mealybugs, where the targets are big and visible. For mites, drenching sprays (soap, neem) that coat entire leaf surfaces are far more effective.
Almost always one of three reasons: you sprayed only once (eggs hatched afterward), you used the same product repeatedly (resistance), or you stopped monitoring too soon (a hidden egg mass restarted the colony). The fix is the full protocol — rotate three products, spray every 3–5 days for a month, and tap-test weekly for six weeks after. Comebacks mean the schedule was cut short, not that the products don’t work.
Predatory mites (like Phytoseiulus persimilis) are fantastic in greenhouses but tricky indoors — they need consistent humidity, they wander off, and they die out once they’ve eaten all the pest mites, leaving you unprotected against the next wave. For a home collection, the spray-and-monitor approach is more practical and reliable. Save the beneficial insects for greenhouse growers and outdoor gardens.
One Comment