How to Make Your Own Potting Mix (3 Recipes)
I used to buy a fresh bag of potting soil every time I brought home a new plant. It felt responsible — new plant, new soil, right? Then I started doing the math. A 2-cubic-foot bag of decent potting mix runs $12–18, and when you’re repotting half your collection each spring, those bags stack up fast. Meanwhile, I noticed something else: some of my plants absolutely hated the bagged stuff. My monstera sat in dense, soggy mix and sulked. My succulents rotted in soil that stayed wet for days.
That’s when I started making my own diy potting mix — and honestly, I wish I’d done it years sooner. Homemade potting mix isn’t just cheaper at scale. It gives you something no bagged product can: complete control over what goes in the pot. You can make it chunky for aroids, gritty for succulents, moisture-holding for ferns — all from the same handful of bulk ingredients sitting in your garage or under the sink.
There’s also a freshness factor nobody talks about. Bagged mixes can sit in warehouses and on store shelves for months. By the time you buy them, the slow-release fertilizer is spent and the peat may have compacted. When you mix your own, everything is fresh, fluffed, and exactly the texture your plants need.
This guide gives you three field-tested recipes: an all-purpose tropical mix, a chunky aroid mix for monsteras and philodendrons, and a gritty succulent mix. I’ll explain what every ingredient does, how to mix in batches, whether you need to sterilize anything, and the mistakes that ruin homemade mixes. Let’s get your hands dirty.
In This Guide
- Why make your own potting mix? (cost, control, peat-free, freshness)
- The base formula every good mix follows
- Ingredient deep-dive: what each component does
- Recipe 1: All-purpose tropical mix
- Recipe 2: Chunky aroid mix
- Recipe 3: Gritty succulent & cactus mix
- How to mix it right: the batch method
- The sterilizing question
- Cost comparison: DIY vs bagged
- 5 mistakes that ruin homemade mixes
- FAQs
Why Make Your Own Potting Mix?
Let’s start with the honest truth: if you own three houseplants and repot once a year, a bagged mix is perfectly fine. DIY potting mix pays off when your collection grows — say, ten or more plants, or you repot seasonally, propagate often, or keep plants that need specialty mixes (aroids, succulents, orchids). Here’s why it’s worth the switch.
Cost savings at scale. Bulk ingredients bought once make dozens of gallons of mix. A compressed brick of coco coir (expands to ~2.5 gallons) costs $4–6. A big bag of perlite runs $10–15 and fills bucket after bucket. Once you’re set up, each gallon of homemade mix costs roughly a third to a half of a comparable bagged specialty mix — and the savings compound every repotting season.
Total control over ingredients. Bagged “indoor” mixes are one-size-fits-all, which means they’re wrong for about half your plants. Monsteras want chunky and airy. Succulents want gritty and fast-draining. Ferns want moisture-retentive. With your own ingredient stash, you tweak the ratio per plant instead of buying three different bags.
Peat-free option. Peat moss mining destroys sensitive bog habitats, and many growers want alternatives. DIY lets you go peat-free easily — coco coir replaces peat one-for-one in most recipes. You decide what’s in your pots.
Fresher than stale bags. Homemade mix is mixed fresh, fluffed, and moistened on the day you use it. No compacted, fertilizer-depleted warehouse soil.
It’s genuinely fun. There’s a real satisfaction in blending your own mix. And once you understand what each ingredient does, you’ll read bagged mix labels with new eyes — and probably never go back.
The Base Formula: What Every Good Mix Needs
Every potting mix — homemade or commercial — is built from four jobs. Understand these, and you can improvise forever:
- Structure/base — the bulk material that holds everything together and stores some moisture. Coco coir or peat moss does this job. Think of it as the foundation.
- Drainage/aeration — chunky, rigid particles that create air pockets so roots can breathe. Perlite, bark, and pumice do this. Without them, roots suffocate in soggy mix.
- Moisture retention — fine materials that hold water the plant can draw on between waterings. Vermiculite, compost, and the base itself contribute here.
- Nutrition — potting mixes aren’t soil; they start nearly sterile and nutrient-free. Compost, worm castings, or added fertilizer provide the food.
The golden rule: roots need both water and air. The main cause of houseplant death is overwatering, but often the real culprit is a mix that holds water without air. A good DIY mix drains freely while retaining enough moisture that you’re not watering daily.
Clemson University’s extension service puts it plainly: a quality container mix must be dense enough to support the plant, hold nutrients, yet let water and air pass through readily while retaining adequate moisture — and they note that coconut coir has become a popular, more sustainable alternative to peat moss. That’s the standard we’re building to here.
Ingredient Deep-Dive: Know Your Components
Before the recipes, here’s what each ingredient contributes — and where to find it.
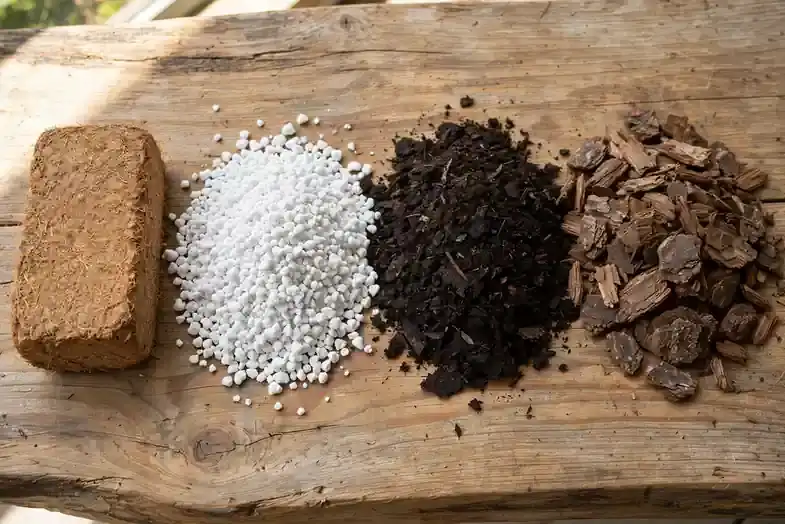
Coco coir — the base. Shredded coconut husk, sold as compressed bricks or loose bags. Holds moisture like peat, rewets easily when dry (peat resists rewetting), and has a near-neutral pH. Rinse or buy pre-rinsed to remove excess salts. Peat-free and renewable. Buy at: garden centers, hydroponic shops, online.
Peat moss — the traditional base. Excellent moisture retention and slightly acidic pH (most houseplants like this). Downsides: harvested from bogs (sustainability concerns), and once bone-dry it becomes hydrophobic and hard to rewet. If you use it, always pre-moisten.
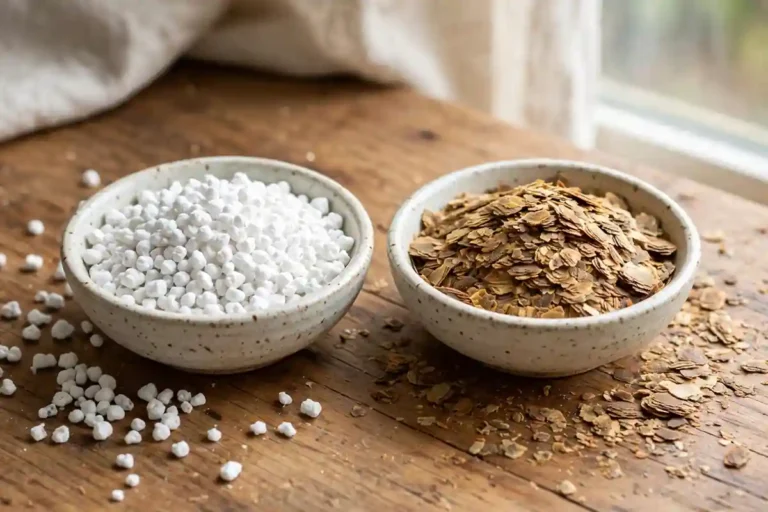
Perlite — the white crunchy bits. Volcanic glass puffed like popcorn. Adds drainage and aeration without holding water. Lightweight, pH neutral, doesn’t decompose. The workhorse of DIY mixes. Tip: buy the coarse grade — fine perlite compacts.
Orchid bark (fir bark) — chunky bark nuggets that create big air pockets and mimic the epiphytic conditions aroids love. Breaks down slowly (1–2 years). Use medium grade for most houseplants. Learn the difference between it and vermiculite in my perlite vs vermiculite guide.
Compost — finished, bagged compost adds gentle nutrition and beneficial microbes. Use sparingly (10–20% of the mix) — too much stays soggy. Make sure it’s fully finished with no ammonia smell.
Worm castings — compost’s richer cousin. Gentle, slow-release nutrition plants love. Also 10–20% max. A handful per pot works as a top-dressing too.
Vermiculite — the layered mineral that looks like tiny accordions. Holds water and nutrients (unlike perlite), releasing them slowly. Great for moisture-lovers and seed starting. Don’t confuse the two — perlite drains, vermiculite holds.
Horticultural charcoal — small charcoal chunks that absorb impurities and odors, and add a bit of drainage. Optional but nice in terrariums and mixes for plants prone to rot. A little goes a long way (5%).
Coarse sand / pumice — sand adds weight and drainage (use coarse builder’s sand, never fine play sand which compacts). Pumice is the premium alternative: porous volcanic rock that holds some water while draining freely, and doesn’t float to the surface like perlite. Excellent in succulent mixes.
Recipe 1: All-Purpose Tropical Mix
This is the workhorse — the mix for pothos, philodendrons (non-climbing types), spider plants, peace lilies, dracaenas, calatheas, ferns, and most leafy tropicals. Light, fluffy, drains well, holds moisture for a few days.
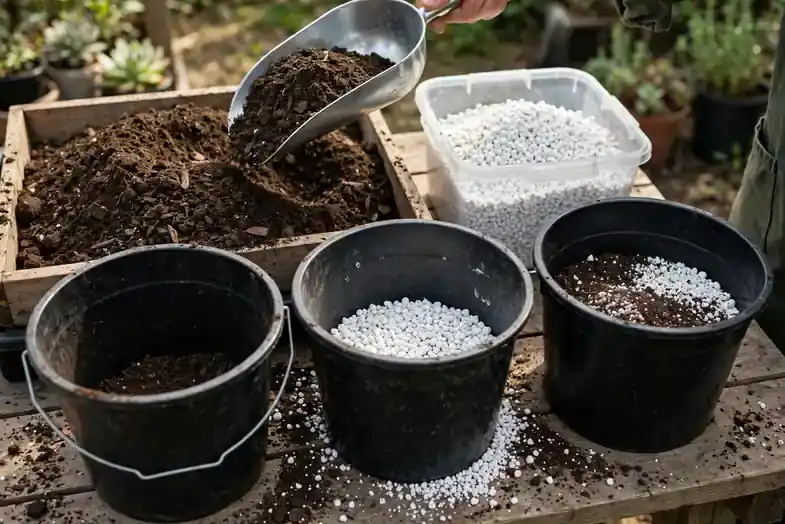
Parts (use any container — a scoop, a cup, a bucket):
| Ingredient | Parts | Job |
|---|---|---|
| Coco coir (or peat moss) | 3 | Moisture-holding base |
| Perlite (coarse) | 2 | Drainage + aeration |
| Orchid bark (medium) | 1 | Air pockets + structure |
| Compost or worm castings | 1 | Gentle nutrition |
Mixing steps:
- Hydrate the coir. Place the compressed brick in a large tub or bucket and add warm water per package directions. Let it expand fully (10–15 minutes), then fluff and squeeze out excess water — you want it moist, not dripping.
- Measure by parts. Add 3 scoops coir, 2 scoops perlite, 1 scoop bark, 1 scoop compost to your mixing tub.
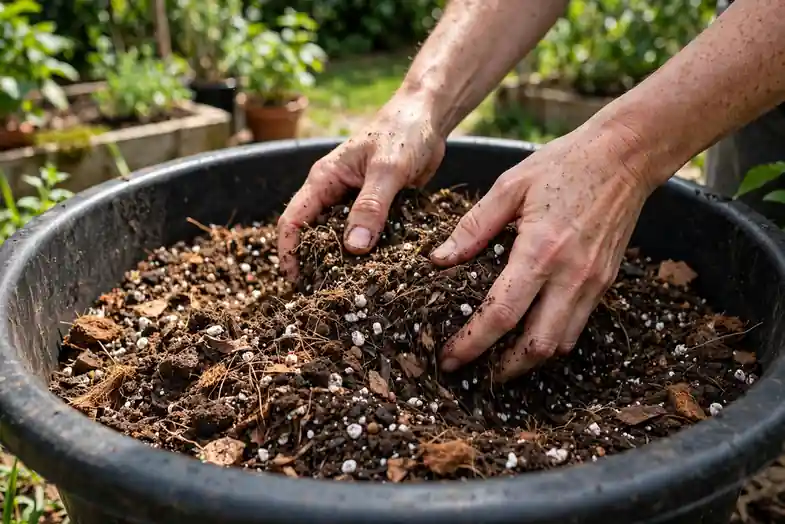
- Toss like a salad. Use your hands or a trowel to blend thoroughly until no streaks of single ingredients remain. Break up any coir clumps.
- Squeeze test. Grab a handful and squeeze: it should clump loosely then crumble apart when poked. Dripping wet = too much water; won’t clump at all = too dry or too much perlite.
- Pot immediately or store. Use it fresh for best results, or store in a sealed tub (details below).
Tweaks: For moisture-lovers like calatheas and ferns, swap 1 part perlite for 1 part vermiculite. For plants that like it drier (ZZ plants, snake plants), add an extra part perlite. This recipe is your starting point — adjust per plant.
If you’re deciding between this and a store bag, my best potting soil for indoor plants guide compares commercial options — but honestly, this homemade version beats most of them.
Recipe 2: Chunky Aroid Mix
Monsteras, philodendrons, pothos (yes, pothos loves chunk too), anthuriums, and ZZ plants are aroids or aroid-adjacent — many grow as epiphytes in the wild, clinging to trees with roots exposed to air. Dense soil suffocates their thick roots. This mix replicates that airy, chunky environment.
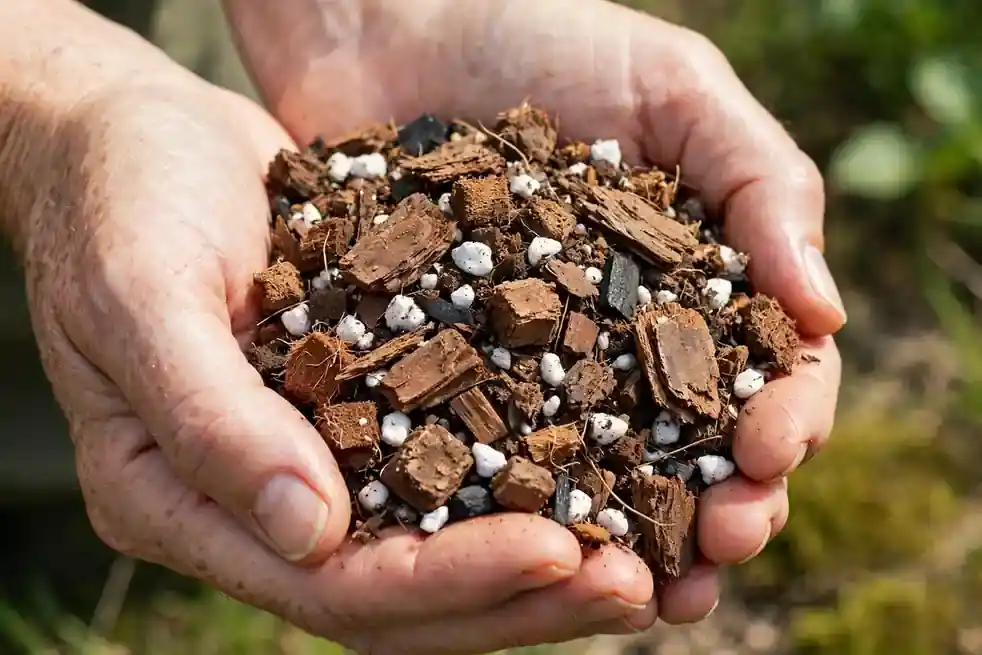
Parts:
| Ingredient | Parts | Job |
|---|---|---|
| Orchid bark (medium) | 3 | Primary structure + air |
| Coco coir chunks or peat | 2 | Moisture base |
| Perlite (coarse) | 2 | Drainage |
| Worm castings | 1 | Nutrition |
| Horticultural charcoal | ½ | Sweetens mix, absorbs impurities |
Why it works: The bark-heavy ratio means water flows through fast while the coir and castings hold just enough. Aerial roots can actually grow into this mix, which is exactly what monsteras want. My monstera went from sulking to pushing out a new fenestrated leaf within two months of switching to this blend — the difference was dramatic.
Mixing: Same batch method as Recipe 1. This mix should feel noticeably chunky in your hands — you should see distinct bark pieces throughout. The squeeze test: it should barely clump at all.
Watering note: Chunky mixes dry faster. You’ll water more often, but that’s the point — roots get air between waterings. If your monstera isn’t splitting, check the mix first: dense soil is a common hidden cause.
Recipe 3: Gritty Succulent & Cactus Mix
Succulents, cacti, and echeverias store water in their leaves — their roots expect long dry periods and sharp drainage. Regular potting mix stays wet too long and causes the mushy, translucent leaves of rot. This gritty blend drains in seconds.
Parts:
| Ingredient | Parts | Job |
|---|---|---|
| Pumice or coarse perlite | 3 | Sharp drainage |
| Coarse sand (builder’s grade) | 2 | Weight + drainage |
| Coco coir or peat | 1 | Minimal moisture base |
| Small gravel or chicken grit (optional) | 1 | Extra grit |
That’s it — roughly 80% mineral, 20% organic. Some growers go even grittier. The mix should feel like coarse gravel with a little fiber in it.
Key rules for succulent mix:
- Never use fine sand (play sand) — it fills air gaps and turns to concrete.
- No compost — too moisture-retentive for most succulents.
- Watering: soak thoroughly, then wait until completely dry. In this mix, that might be every 10–14 days instead of every 3–4 weeks in dense soil — but the roots stay healthy.
- If your succulent’s leaves are going mushy and falling off, the mix is the first suspect.
Where to buy grit: Pumice and chicken grit come from feed stores and landscaping suppliers — much cheaper than garden-center bags. Coarse builder’s sand is at any hardware store.
How to Mix It Right: The Batch Method
Mixing a gallon for one repot? A bucket and your hands are fine. Mixing for a whole collection? Use the batch method:
- Lay out a tarp or use a large storage tub. A 27-gallon tote is perfect — it doubles as storage.
- Hydrate coir/peat first. Never mix dry peat or coir — the dust is unpleasant and dry peat repels water. Pre-moisten, squeeze to damp.
- Add ingredients largest to smallest. Bark first, then coir, then perlite, then fine stuff (castings, charcoal). This prevents the fines from settling at the bottom.
- Mix in thirds. Blend the first third of ingredients, add the next third, blend again. Way more even than dumping everything at once.
- Do the squeeze test (described in Recipe 1) and adjust.
- Store sealed. Keep leftover mix in the tote with the lid on, in a cool spot. It stays fresh for months. Label it with the recipe name and date — future you will thank present you.
- Re-fluff before use. Stored mix compacts. Dump it out, break it up, and re-moisten lightly before potting.
Dampen, don’t soak. The ideal working moisture is “wrung-out sponge” — moist enough to hold shape loosely, not dripping. Dry mix is dusty and hydrophobic; soggy mix compacts in the pot.
The Sterilizing Question: Do You Need To?
You’ll read heated debates about sterilizing homemade mix. Here’s the practical answer:
You probably don’t need to sterilize if you’re using fresh, bagged commercial ingredients (coir, perlite, bark, bagged compost). These are effectively sterile or low-risk out of the bag. Clemson Extension notes that commercial soilless mixes are sterile and easy to handle — your DIY version from the same ingredients is no different.
Consider pasteurizing when:
- You’re using garden soil in a mix (don’t — but if you must, bake it: spread 3 inches deep on a tray, 180°F for 30 minutes)
- You’re reusing old potting mix from a plant that had root rot or pests
- You’re using homemade compost of unknown quality
How to pasteurize: Moisten the mix, spread it in oven-safe trays, cover with foil, and bake at 180°F (not hotter — higher temps release toxic compounds) for 30 minutes. Yes, it smells. Do it with windows open.
Fungus gnat note: Gnats love moist, organic-heavy mix. Letting the top inch dry between waterings and top-dressing with sand or fine gravel breaks their breeding cycle. More in my fungus gnats guide.
DIY vs Bagged: The Cost Breakdown
Real numbers for making ~10 gallons (about 1.3 cubic feet) of all-purpose mix:
| Item | DIY cost | Notes |
|---|---|---|
| Coco coir brick (expands to ~2.5 gal) × 3 | ~$15 | Makes ~7.5 gallons of base |
| Perlite, 2 cu ft bag | ~$14 | Enough for many batches |
| Orchid bark, 2 cu ft bag | ~$16 | Enough for many batches |
| Worm castings, 15 lb bag | ~$18 | Enough for many batches |
| First-batch total | ~$63 | Yields ~15+ gallons of mix |
| Cost per gallon (first batch) | ~$4 | |
| Cost per gallon (later batches) | ~$2 | Ingredients stretch far |
Compare: bagged premium indoor mix runs $5–8 per gallon equivalent; specialty aroid or succulent mixes run $8–12+ per gallon. The first batch roughly breaks even — every batch after that is dramatically cheaper. If you repot 10+ plants a year, you save $50–100 annually, and the mix is better.
5 Mistakes That Ruin Homemade Mixes
1. Using garden soil. The #1 mistake. Garden soil is dense, full of weed seeds and pathogens, and compacts in pots. Clemson Extension explicitly warns against it for containers unless pasteurized and heavily amended. Potting mix is soilless for a reason.
2. Wrong ratios — too much of the water-holders. Beginners often go heavy on coir/compost “to feed the plant” and light on perlite/bark “to save money.” Result: swamp. When in doubt, add more drainage, not less. You can always water more often; you can’t un-rot roots.
3. Forgetting drainage entirely. A mix of pure coir or pure compost isn’t a potting mix — it’s a sponge. Every recipe needs its perlite/bark/grit component.
4. Fine sand instead of coarse. Play sand and beach sand are too fine — they fill air pockets and cement the mix. Only coarse builder’s sand or horticultural sand.
5. Mixing bone-dry and potting immediately. Dry peat/coir repels water, so your first watering runs down the sides while the root ball stays dry. Always pre-moisten. Your plants will establish faster.
Bonus mistake: no nutrition. A mix of only coir + perlite + bark has essentially zero nutrients. That’s fine if you fertilize regularly — but if you’re a forgetful feeder, include the compost/castings portion. Pair with a repotting routine from how to repot houseplants and you’re set.
Frequently Asked Questions
Sealed in a lidded tote in a cool spot, 6–12 months easily. The mineral components (perlite, bark, sand) don’t expire. Compost and castings slowly lose nutritional punch, so for mixes stored over 6 months, add a fresh handful of worm castings when you use it. If it smells sour or musty, spread it out to air-dry — anaerobic storage is the usual culprit.
You can, but make it finer. Sift the all-purpose recipe through a 1/4-inch screen to remove big bark chunks, and consider bumping vermiculite for consistent moisture. Seeds need steady moisture and zero fertilizer until they sprout — so skip the compost in a dedicated seed-starting version. Many growers prefer a simple 1:1 coir-to-vermiculite blend for seeds.
“Better” depends on your priorities. Coir is renewable, pH-neutral, and rewets easily — big practical wins. Peat holds slightly more water and is naturally acidic (good for acid-lovers). For sustainability, coir wins clearly; peat bogs regenerate over centuries. Performance-wise they’re interchangeable in these recipes. I use coir for everything now and haven’t looked back.
That fuzzy white coating is usually harmless saprophytic fungus feeding on the bark and compost — it shows up when the surface stays damp. Let the top inch dry between waterings, improve air circulation, and scrape it off. It’s the same white mold on houseplant soil that appears on bagged mixes — not a sign your recipe failed.
Yes, with conditions. If the previous plant was healthy, reuse is fine — refresh it with 20–30% new compost/castings and fresh perlite (old perlite crushes down). If the plant had root rot, pests, or disease, pasteurize it first (180°F for 30 minutes) or discard it. Never reuse mix from a plant that died of unknown causes without sterilizing.
Outdoor pots dry faster and face rain, so increase water retention slightly: add an extra part coir and consider vermiculite over perlite for the drainage portion. Outdoor mixes also benefit from a slow-release granular fertilizer mixed in at potting time, since rain leaches nutrients fast. The base recipes still work — just tweak toward moisture.
Mostly marketing. True “potting soil” contains actual soil; “potting mix” is soilless (coir/peat + perlite + bark). For indoor plants, soilless mix is almost always better — lighter, cleaner, better draining. When a bag says “potting soil” for indoor use, check the ingredients: if it’s peat/coir-based with perlite, it’s a mix wearing a soil costume.
The compost/worm castings portion provides gentle nutrition for the first 1–2 months. After that, fertilize as you normally would — half-strength liquid feed monthly in spring and summer for most houseplants. Slow-release granular fertilizer mixed in at potting time is a good low-maintenance alternative. The mix is the foundation; fertilizer is the ongoing diet.
Completely normal — perlite is lighter than water. Top-dress with a thin layer of bark or coarse sand to hold it down, or switch to pumice which stays put. It doesn’t hurt the plant; it’s cosmetic. Bottom-watering also prevents the float-up entirely.