The Complete Peace Lily Care Guide: Light, Water, Blooms & Honest Fixes
If there’s one houseplant that gets handed to beginners with total confidence, it’s the peace lily — and for once, the confidence is mostly earned. A peace lily (Spathiphyllum) grows fast, forgives a missed watering with nothing worse than a theatrical swoon, and produces those white “flowers” in light levels where most blooming plants refuse to try. It is, genuinely, one of the easiest flowering plants you can keep in a house.
But there’s a gap between a peace lily that survives and a peace lily that blooms, and most of the disappointment I hear about lives in that gap. The plant from the shop arrived covered in white spathes. A year later it’s a handsome pot of green leaves that hasn’t flowered since. Nothing is dying. Nothing is even unhappy, exactly. It’s just missing one or two of the things it actually needs — and the plant tags never told you what they were. This guide to peace lily care will: the light that triggers blooms, the watering rhythm that keeps the drama optional, and the honest reasons yours stopped flowering, including the one about how the shop plant got its flowers in the first place.
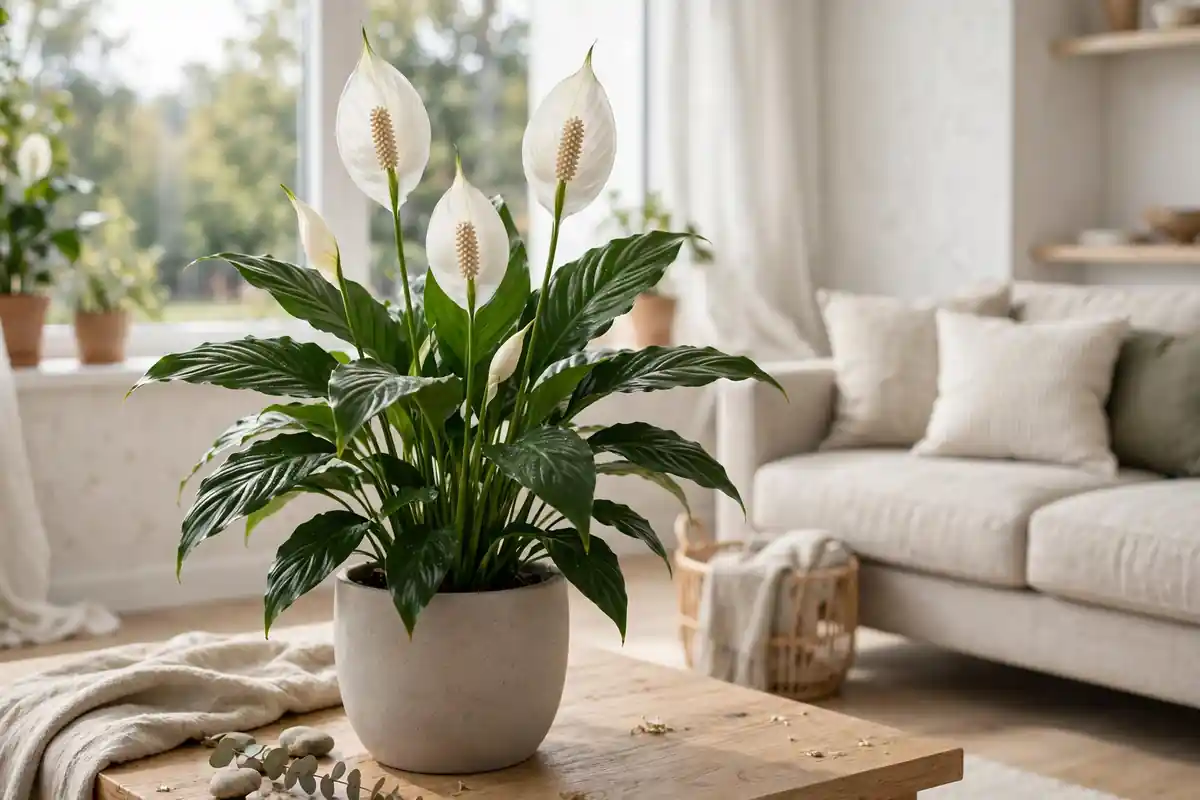
A quick word about what the “flower” is, because it explains half the plant’s behavior. The white sail is a spathe — a modified leaf — and the knobbly cream spike inside it, the spadix, is where the actual tiny flowers live. So a peace lily “bloom” is a leaf doing an impression of a petal, which is why it lasts for weeks instead of days, why it can photosynthesize (remember that when we talk about green blooms), and why the plant can keep making them in light too dim for true flowers. And one housekeeping note, since it follows this plant everywhere: yes, peace lilies appeared in NASA’s famous clean-air study — in sealed test chambers, at concentrations no living room will ever match. Grow it because it’s beautiful and forgiving, not as an appliance.
Quick-Start Summary: The Essentials at a Glance
| Need | What to do |
|---|---|
| Light | Medium to bright indirect; gentle morning sun fine; survives low light but won’t bloom there |
| Water | Keep evenly moist — water when the top inch of soil has dried, then soak and drain fully |
| Soil | Moisture-holding but draining mix (recipe below); pot must have drainage holes |
| Feeding | Balanced fertilizer at quarter to half strength, every 6–8 weeks in spring and summer; none in winter |
| Temperature | 65–85°F is home; keep above about 60°F and away from drafts, vents, and cold glass |
| Humidity | Appreciates above-average humidity more than most houseplants — but ordinary rooms still grow it well |
| Blooming | Needs real light, maturity, and a light feeding hand; shop blooms are grower-scheduled (see Flowering) |
| Propagation | Division only, at spring repotting |
| Pets | Toxic if chewed (mouth irritant) — but NOT a true lily; see Pet Safety for the distinction that matters |
Keep that table and you can keep a peace lily alive for years. The rest of this guide is how you get it to bloom, keep its leaf tips clean, and stop the droop from being a weekly event.
Light: Enough to Read By, If You Want Flowers
Peace lilies wear a reputation as low-light plants, and like most reputations it’s half the story. Here’s the whole of it: a peace lily will survive in remarkably dim conditions — a north-facing room, an office corner lit by ceiling panels, the hallway where nothing else lives. It will sit there, green and composed, for a very long time. What it will not do there is bloom, and it will grow slowly, with longer, floppier leaves as it reaches for light it can’t find. Low light is this plant’s survival skill, not its preference.
The light it actually wants is medium to bright indirect: a spot a few feet back from a south or west window, right up against an east window (gentle morning sun is not just tolerated, it’s useful), or a bright windowsill softened by a sheer curtain. The old extension-service test is still the best one I know: if the spot is bright enough to comfortably read a newspaper by daylight, it’s bright enough to bloom a peace lily. If you have to turn a lamp on to read at noon, the plant will live — it just won’t flower.
Two light mistakes cause most of the visible damage. The first is hard direct sun, especially afternoon sun through glass: it bleaches and scorches pale, papery patches into the leaves, and a scorched patch never heals. An hour of gentle early sun is fine; a blazing western windowsill in July is not. The second is the slow mistake — a plant kept so dim that it stops blooming, stretches, and dries out oddly (a plant using almost no light drinks very little water, so its soil stays wet for ages, which starts to look like a watering problem when it’s really a light problem wearing a disguise).
The practical rule: give it the brightest spot you have that isn’t a sunbeam, and if it has to live in the dim corner, accept the trade on purpose — a foliage plant, handsome and green, no flowers promised. If flowers are the point, the light is the first thing to fix. It is almost always the first thing.
Reading your plant’s light signals:
- No blooms for a year or more, slow leggy growth, leaves reaching toward the window → not enough light. Move it brighter.
- Pale, washed-out leaves with brown crispy patches → too much direct sun. Pull it back or add a sheer curtain.
- Deep green, glossy leaves and regular white spathes → you’ve nailed it.
And if your only available spot is genuinely dark, consider a simple full-spectrum grow light on a timer, 10–12 hours a day. For this plant it’s the difference between one that merely exists and one that blooms.
Flowering: Why Yours Stopped, and How to Restart It
This is the section most peace lily owners actually came for, so let’s be thorough and honest, in the order the causes usually rank.
First, the normal rhythm. A mature peace lily in decent light blooms in flushes — mainly in spring, often again in late summer or fall — and each spathe stays presentable for weeks. As a spathe ages (roughly past the ten-day mark), it gradually turns pale green, because the spathe is a leaf and it starts photosynthesizing like one; it can linger, green and harmless, for another month before it browns and should be cut away. Between flushes, a healthy plant making only leaves for a season is not broken. It’s between acts.
Reason 1: light. Far and away the most common cause of a bloomless peace lily. Blooming is expensive, and the plant pays for it out of its light budget. A plant in a dim room runs a deficit budget — leaves first, flowers never. Move it somewhere genuinely bright (the newspaper test above) and give it a season; this single change restarts more peace lilies than everything else on this page combined.
Reason 2: the plant is young or newly divided. A small plant, a recent division, or a little grocery-store offset may need a year or more of growing before it’s mature and stocked up enough to flower. Patience is the whole prescription — keep the leaves coming and the flowers follow size.
Reason 3: you’re feeding it leaves. Fertilizer mix matters here. A high-nitrogen feed pushes lush foliage — the plant reads abundant nitrogen as “grow leaves” weather. Heavy feeding generally also risks the salt buildup that burns leaf tips (see Feeding). If your plant is huge, glossy, and flowerless, especially one that’s been fed generously and often, ease off: lighter feeding, less often, and let light do the persuading.
Reason 4: the pot is too big. Peace lilies bloom best when they’re snug — a plant in a pot just big enough for its roots puts energy into flowers; the same plant swimming in an oversized pot puts it into roots and leaves, and the extra wet soil around it courts rot besides. “Plenty of room to grow” is kind advice for many plants and exactly wrong for this one.
And now the honest one: your shop plant’s blooms were scheduled. Commercial growers can force peace lilies into uniform, sellable flower by treating them with gibberellic acid, a plant growth hormone that triggers flowering on demand. That’s how a whole bench of identical plants arrives in bloom the same week in March. It does the plant no lasting harm — but it means the display you bought was chemically timed, not a promise about the plant’s natural rhythm in your house. Home reblooming runs slower, follows the seasons, and depends on light and maturity in a way the forced flush didn’t. So when a peace lily “never blooms again,” usually nothing went wrong: the artificial schedule ended, and the natural one — which you can absolutely get going with the four fixes above — is less punctual. Anyone who sells you a spray or a special food as a shortcut back to shop-style blooming is selling you the one thing this section says doesn’t exist at home. Light, maturity, restraint with the fertilizer bottle: that’s the real recipe, and it works.
Green blooms, answered fully: a spathe that comes up green from the start is usually a light story too — in low light the plant makes a leafier, greener spathe — while a white spathe turning green with age is the normal photosynthesizing phase described above. Old green spathes won’t whiten again; cut them at the base when they stop pleasing you and let the plant spend on new ones.
Watering: Evenly Moist, and Ahead of the Droop
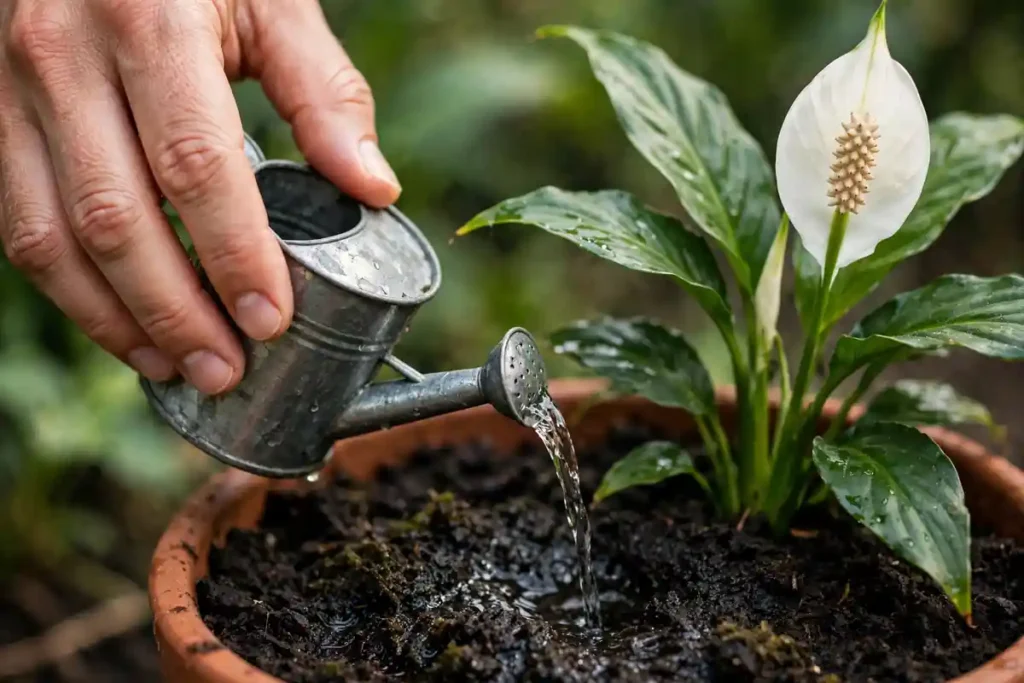
A peace lily’s watering rule is one sentence: keep the soil evenly moist, and never soggy. The working check is the top inch — push a finger in; if the top inch has dried out, water. If it’s still cool and damp, walk away. In most homes that lands around once a week in spring and summer, less in winter or a dim room — but the finger, not the calendar, makes the call. When you water, water properly: soak the mix until water runs freely from the drainage holes, let it drain completely, and empty the saucer. A peace lily standing in runoff is a peace lily whose roots are drowning from the bottom up.
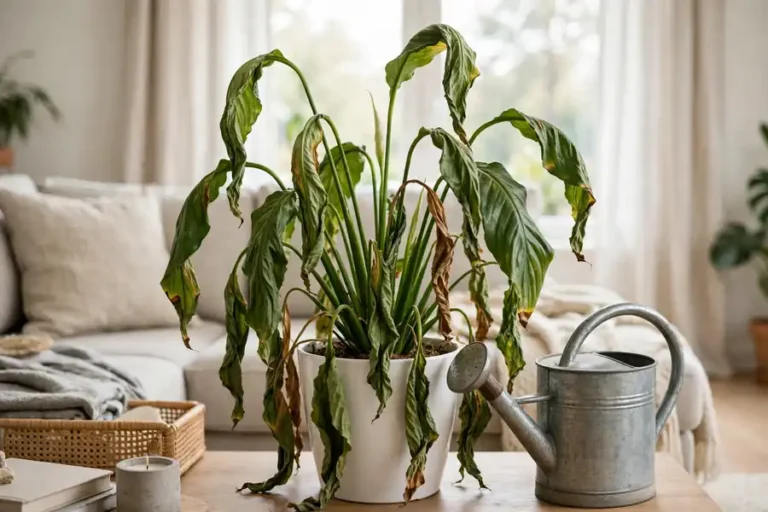
The droop, honestly appraised. No houseplant communicates like this one. A thirsty peace lily doesn’t subtly wilt — it collapses, leaves hanging like wet laundry, looking for all the world like a plant that died overnight. Water it, and it stands back up: you’ll see leaves begin lifting within the hour, and the plant is typically fully itself again within a few hours (a badly parched one may need overnight). That built-in gauge is genuinely useful, and you’ll read advice — even from good sources — to simply wait for the droop and water then. Here’s the calibration that advice leaves out: an occasional droop costs the plant almost nothing, which is why it’s famous for forgiving. But running a peace lily on repeated total collapse is a slow tax. Each full wilt stresses the fine roots, and over months the plant pays in yellowing older leaves, browned edges, and — ironically — fewer blooms. Drooping is also genuinely ambiguous at the far end: a plant drooping in wet soil isn’t thirsty at all, it’s a plant whose roots are in trouble and can’t drink (that’s the fork our drooping guide below is built on). So use the droop as what it is — an alarm that tells you you’re late — not as the scheduling system. Water when the top inch dries, a day or two ahead of the drama, and keep the swoon for the vacations and the forgotten weeks, where it earns its reputation.
Water quality matters more for this plant than most. Peace lilies are sensitive to what’s dissolved in tap water — fluoride, chlorine, and accumulated salts are the usual suspects behind brown leaf tips. If your tips brown while everything else is right, switch for a while to rainwater, distilled water, or tap water that has stood uncovered overnight (which lets chlorine dissipate), and flush the pot with plain water every few months to wash salts out the bottom. Room-temperature water, too — this is a tropical plant, and ice-cold water is a small shock it doesn’t need.
One more moisture truth: peace lily soil that stays wet because the room is dim is a trap that catches people. The plant drinks in proportion to its light. If the mix is still soggy a week after watering, the fix is usually more light or a smaller pot — not a longer interval that leaves the roots sitting in the same cold soup.
Soil & Potting: Moist, But Breathing
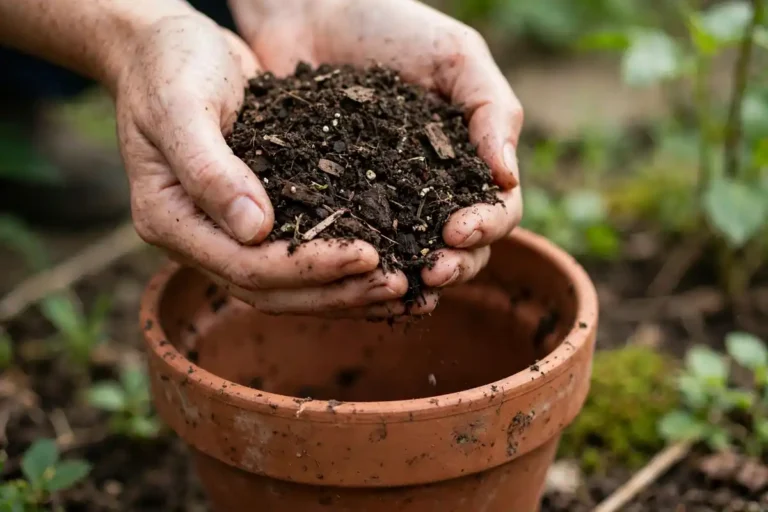
Peace lilies grow on the tropical forest floor, in loose, rich litter that holds moisture without ever becoming a swamp — and your mix should imitate that bargain. A recipe that works:
- 2 parts good-quality indoor potting mix (the moisture-holding base)
- 1 part perlite or pumice (keeps air in the mix and stops it compacting)
- 1 part fine bark or coco coir chunks (structure — the “forest floor” texture)
Plain bagged houseplant mix with a generous handful of perlite stirred through does most of the job if that’s what you have. What you want to avoid is the two extremes: dense, heavy mix that stays wet for ten days (rot follows), and a gritty cactus-style mix that drains so fast this moisture-loving plant can never catch up.
Pot rules. Drainage holes: non-negotiable — keep the plant in its nursery pot inside a decorative cachepot if you like the look, and lift it out to water or empty the cachepot every time. Size: snug, per the flowering section — go up one size only, an inch or two wider, when you repot. Terracotta breathes and dries fast, which forgives a heavy watering hand but asks for more frequent checks with a plant this thirsty; plastic and glazed pots hold moisture longer and suit this plant well. Know which keeper you are.
Repot on evidence, not on anniversaries: roots poking from the drainage holes or heaving the plant up, water running straight through a root-packed pot so the plant is thirsty again in a day or two, or a plant that’s become a solid mass of stems with no soil visible. For a healthy grower that’s typically every year or two, in spring. Slide it out, tease the roots gently, set it at the same depth in fresh mix, water once to settle — and know that repotting day is also division day, if you want more plants (next sections).
Feeding: A Light Hand, On Purpose
Peace lilies need less fertilizer than the fertilizer aisle would like, and the extension services are blunter about this than the blogs: quarter-strength is a recurring theme in their guidance. My routine: a balanced liquid houseplant fertilizer at quarter to half the label strength, every six to eight weeks in spring and summer, and nothing from fall through winter, when the plant isn’t growing and can’t spend what you give it.
Overfeeding shows up in two ways on this plant, and both masquerade as other problems. The visible one is brown, crispy leaf tips and edges: fertilizer is salt, salts accumulate in a pot, and the leaf tips — the far end of the plumbing — are where the burn announces itself. The quieter one is the bloomless plant from the Flowering section: generous, frequent feeding, especially nitrogen-heavy feeding, buys you magnificent foliage and no flowers. If your plant is fed monthly at full strength and hasn’t bloomed in a year, the bottle is a suspect, not a solution.
The prevention is cheap: feed lightly as above, and every few months run plain water slowly through the pot — several pot-volumes’ worth, draining freely — to flush the salt bank out before the leaf tips have to tell you about it. And never feed a stressed plant: a wilting, freshly repotted, or root-suspect peace lily gets plain water until it’s growing again. Fertilizer on damaged roots is salt on a wound.
Humidity & Temperature: Warm and a Little Steamy
Here’s where the peace lily differs from the desert houseplants: it comes from genuinely humid forest understory, and it does appreciate above-average humidity more than most — leaves stay cleaner-tipped, new growth unfurls more easily, and the whole plant looks glossier in a humid room. A bright bathroom is a peace lily’s idea of a spa, and grouping plants together (they raise the humidity in their shared pocket of air) suits it well. If you run a humidifier for yourself in winter, park the peace lily in its benefit radius and it will be the first plant to thank you.
Now the calibration, because this gets oversold in both directions. Appreciates is not requires: a peace lily grows perfectly well in ordinary room air, and I have never seen one fail for lack of a humidifier. Misting, specifically, is mostly theater — it wets the leaves for minutes, does nothing measurable to the air, and leaves water sitting where fungal spots like to start. If your winter air is truly desert-dry and the plant sits near a heating vent, move it away from the vent first (that dry blast was probably the problem anyway) and consider the humidifier second. Dry air is a supporting actor in the brown-tips story at most; the lead roles belong to water minerals and watering rhythm.
Temperature is undramatic but has one hard edge. The comfort zone is 65–85°F, overlapping yours almost exactly. Below about 60°F the plant sulks and growth stalls; sustained cold — a night against freezing glass, a chilly porch in a cold snap, an icy draft — does real damage, and the damage has a signature you’ll meet in the problems section: leaves that go dark and black. Cold plus wet soil is the genuinely lethal combination. Keep it off winter windowsills in hard weather, out of AC blasts and heating-vent paths, and temperature will never be the section of this guide you come back to.
Pruning & Grooming: Five Minutes, Occasionally
A peace lily asks very little of your scissors, but what it asks, it asks precisely.
Spent blooms. When a spathe has greened, browned, and given up, follow its stalk all the way down and cut it off at the very base, as low as you can reach. Don’t leave a stub halfway down the stalk — it just dies back untidily and the plant keeps paying rent on it. Each bloom stalk is a one-shot structure; removing it cleanly is tidiness, and the plant’s next flowers will come on new stalks regardless.
Yellow leaves. A peace lily retires its oldest, lowest leaves steadily — one going yellow at the base of a growing plant is housekeeping, not a symptom. Cut or gently pull them off at the base. Yellow spreading upward through the plant is a different sentence entirely (see Problems).
Brown tips, trimmed right. Dead brown tissue never re-greens, so trim it — but cut inside the brown, leaving a hair-thin sliver of the dead edge. Cut into living green and you’ve made a fresh wound, which browns in its turn, and the tip creeps backward with every trim until the leaf looks chewed. Then fix the cause (water quality and feeding, above); trimming is cosmetics, not treatment.
Dust and pollen. Those broad leaves collect dust, and dust costs light — wipe them with a damp cloth now and then, supporting each leaf from underneath so it doesn’t crack. A mature spadix also sheds fine pale pollen dust onto the leaves below it; it’s harmless, wipes off with the same damp cloth, and if it annoys you, you can snip the spadix out of a fresh spathe and keep the white sail pollen-free.
Dividing as grooming. When the plant becomes a crowded thicket of crowns, the spring repot is your chance to tidy by dividing — which is also the whole propagation story, next.
Propagation: Division, and Only Division
Let’s start with the honest negative, because it saves real heartbreak: a peace lily cannot be propagated from a leaf, a leaf stalk, or a stem cutting. There are no nodes on a stem to root from, as there are on a pothos or a monstera — a peace lily grows as a cluster of crowns on a short rhizome, and a separated leaf in a jar of water will sometimes even grow roots and live for months. It will never become a plant. Growers call that a zombie leaf, and the internet sells the trick anyway. The one real method is division, and fortunately it’s easy and reliable.
Divide at repotting time, ideally in spring when the plant is about to grow hard:
- Water the plant the day before — hydrated roots are flexible roots, and the whole operation goes gentler.
- Slide the plant out of its pot and shake or rinse the old mix off the root ball until you can see the structure: a cluster of crowns, each with its own fan of leaves and its own roots, joined at the rhizome.
- Tease the clump apart with your fingers, working the crowns away from each other. Where they resist, cut the connecting rhizome with a clean, sharp knife — keep a healthy share of roots on every piece, and aim for divisions with at least three or four leaves each. Small, leafless fragments are the ones that fail.
- Pot each division snugly in the fresh mix from the soil section, at the same depth it grew before, and water it in.
- Keep the divisions evenly moist and out of bright light for the first few weeks while they re-establish. Expect a sulk — drooping, a paused month, sometimes a sacrificed leaf. That’s transplant adjustment, not failure; a division with roots and a crown almost always pulls through.
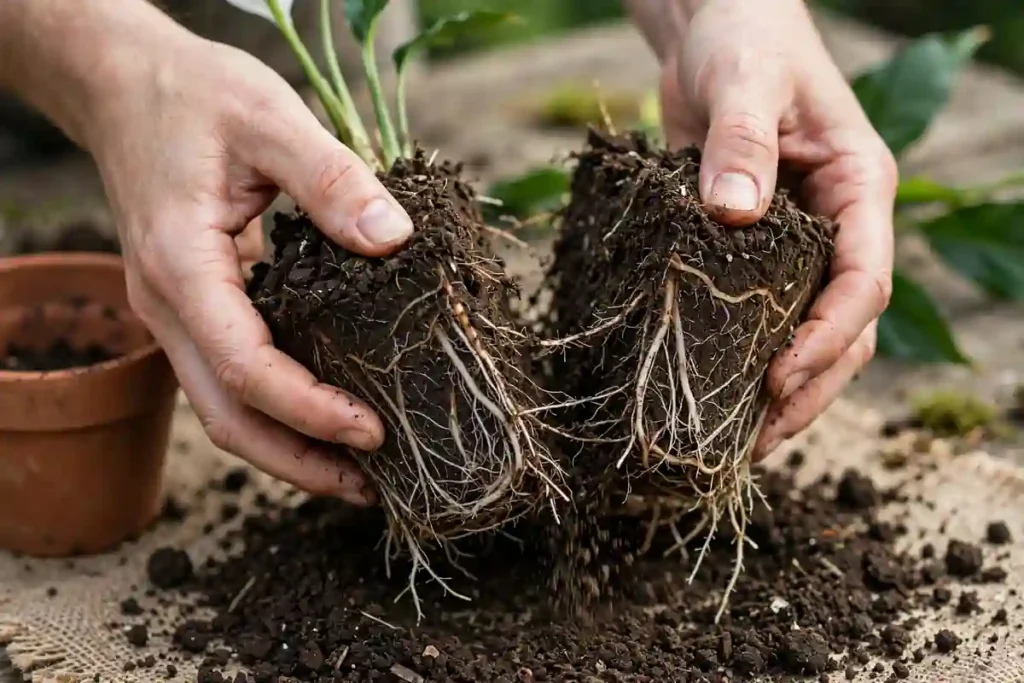
Spring divisions typically settle within a few weeks and can be growing visibly by midsummer — and a big mother plant divided into three is also how you fix the overgrown thicket from the grooming section. What you can’t do is hurry a division into flowering: remember Reason 2 in the Flowering section, and give each new plant its year.
Aftercare, for divisions and plain repots alike: pot each division at the same depth it was growing — never bury the crown deeper, because buried crowns rot — then water thoroughly and hold off on fertilizer for four to six weeks while roots establish. Steady warmth, lightly moist (not wet) soil, and patience through a week or two of sulking is the whole recipe; a divided peace lily that sulks, then pushes new leaves, is behaving perfectly normally.
Varieties at a Glance
All peace lilies are Spathiphyllum running on this same care sheet. What changes with variety is mostly scale — and scale changes how fast the pot dries and how much light the plant can use. Shop by the space you actually have:
| Type | Size at maturity | Notes |
|---|---|---|
| Small tabletop types (the classic S. wallisii forms) | About 12–18 inches tall | The desktop and gift-plant size; bloom young and readily; dry out fastest — check them most often |
| ‘Domino’ | About 1½–2 feet | White-splashed, variegated leaves; the pattern needs decent light to stay bold, and it grows a touch slower than the all-green forms |
| Mid-size classics (the common florist types) | About 2–3 feet tall and wide | The default houseplant peace lily — the plant this whole guide is calibrated to; statuesque on a stand or low table |
| ‘Sensation’ | 4½ feet and more, with huge ribbed leaves | The largest common cultivar — a floor plant with real presence; needs floor space, a heavy pot so it can’t tip, and correspondingly more water per drink |
A note that applies to all of them: the little plant in the 4-inch pot at the grocery store is a juvenile of whatever variety it is, priced by the pot, not by its future. Check the tag for the cultivar name, and if there isn’t one, assume a mid-size classic — the most common outcome by far — and plan the corner accordingly.
The Year at a Glance: A Seasonal Care Calendar
| Season | Light | Water | Feed | Watch for |
|---|---|---|---|---|
| Spring | Bright indirect; the best growth window | Increase as growth resumes | Start half-strength every 6 weeks | Bloom stalks emerging; ideal repotting and division time |
| Summer | Bright indirect; shield from harsh sun | Most frequent; check every few days | Continue light feeding | Fast drying in air conditioning; keep away from cold vents |
| Fall | Move closer to windows as days shorten | Reduce as growth slows | Last feed in early fall | Cold drafts from windows |
| Winter | Brightest available spot; a grow light helps | Least frequent; the soil dries slowly | Stop completely | Brown tips from dry heated air; never near radiators |
Common Problems Preview: The Short Answers
Start with the symptom — the likely cause and the first fix:
| Symptom | Most likely cause | Fix |
|---|---|---|
| Dramatic droop, dry soil | Underwatered | Water deeply; it recovers in hours |
| Droop with wet, soggy soil | Overwatered / root rot | Stop watering; check the roots, repot into fresh mix if mushy |
| Yellow leaves (lower, older) | Natural aging, or overwatering | Remove them; check the watering rhythm |
| Yellow leaves (new growth) | Overwatering or a nutrient issue | Let the soil dry more; flush salts; check drainage |
| Brown, crispy leaf tips | Fluoride and salts first; dry air a distant second | Switch water; flush the soil |
| Brown patches after moving | Sunburn | Move it out of direct sun |
| No blooms for 12+ months | Too little light (usually) | Brighter indirect light; a mature plant; light feeding |
| Flowers turning green | Natural aging — or low light / excess nitrogen on new blooms | Deadhead the old; adjust light and feeding |
| Black leaf tips | Overwatering, or cold damage | Check the roots; move away from cold drafts |
| Wilting right after repotting | Transplant shock | Normal — steady warmth, light moisture, wait 1–2 weeks |
| Tiny flies around the soil | Fungus gnats — the soil is too wet | Let the top 2 inches dry; sticky traps |
| Sticky leaves / cottony clusters | Mealybugs or scale | Wipe with rubbing alcohol; insecticidal soap |
Most peace lily trouble announces itself in the leaves. These are the honest short versions — each with the door to the full diagnosis where the site keeps it.
Drooping — the headline. Read it with the fork. Drooping with dry soil is thirst: water thoroughly and watch the recovery — leaves lifting within the hour, the plant itself again within a few hours. Drooping that doesn’t recover after watering, or drooping while the soil is still wet, is the other diagnosis: roots damaged by staying wet too long can’t drink, and the plant wilts in the middle of plenty. That plant needs its roots inspected, not another drink. The full walk-through — how long recovery should take, the root-rot rescue, and how to tell a one-off swoon from a plant in real trouble — is our guide to why a peace lily is drooping.
Yellow leaves. One or two of the oldest, lowest leaves yellowing slowly is retirement; the plant sheds them its whole life. Yellow spreading through the plant, newest leaves included, usually means the roots have been sitting wet — check how the soil has been living before you change anything else. Yellow with a generally starved, pale look on a plant in a dim room is the light budget again: it can’t afford its leaves. Pattern first, then action.
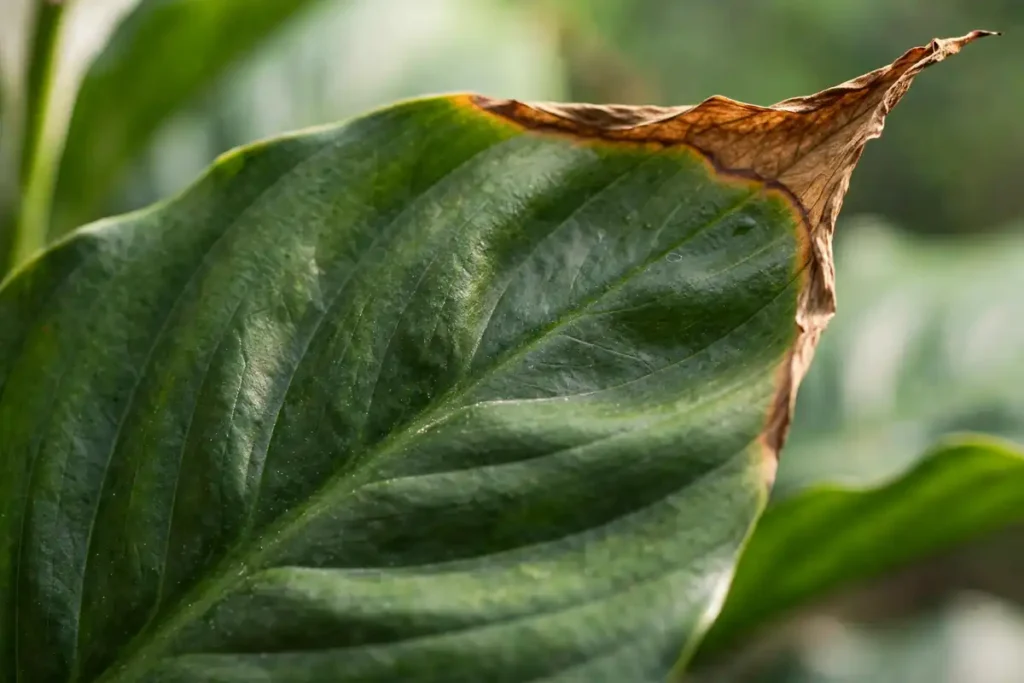
Brown tips and edges. The far end of the leaf complains about what’s in the water and the pot: fluoride and chlorine from tap water, and salts built up from feeding, are the usual story — the tip is where the plant deposits what it can’t use, and the tip dies there. Dry air plays a supporting role at most. Switch water for a while, flush the pot, lighten the feeding hand. The full water-chemistry fight — what each filter type really removes, and why boiling makes it worse — is worked through in our spider plant brown tips guide; the chemistry is identical, only the plant is different. Diagnosis in 60 seconds: brown tips on otherwise healthy leaves + municipal tap water = water quality. Brown tips appearing in winter = the dry heated air joining in. Brown tips + a white crust on the soil = fertilizer salts. Brown crispy edges and patches after a sunny move = sunburn, not tips at all.
No blooms. Not a disease — a budget. Work the Flowering section in order: light first (the newspaper test), then maturity, then your feeding hand, then the pot size. A green, growing, flowerless peace lily is almost never sick; it’s underfunded.
Black leaves. The alarm bell. Leaves going dark brown to black, especially after a cold night, a move to a chilly spot, or a cold draft, are usually cold injury — damaged tissue dies dark. Black and mushy at the base, with wet soil and a sour smell, is advanced root rot instead, and it’s the one problem on this page that can’t wait: unpot the same day, cut away everything soft and black back to firm tissue, and repot into fresh mix. Cold-blackened leaves won’t recover either, but a plant whose crown and roots are still firm will grow out of the damage.
Tiny flies around the pot. Fungus gnats — small black flies that rise when you water. They’re mostly harmless to a mature plant, but they’re reliable witnesses: they breed in soil that stays moist at the surface, which is this plant’s whole lifestyle if you let it be. Letting the top inch dry properly between waterings (which the plant wants anyway) breaks their cycle; our fungus gnats guide has the full eviction, traps to Bti, for when they’re established.
Pet Safety: A Real Irritant, but Not a “Lily” Problem
Peace lily leaves contain calcium oxalate crystals — tiny, needle-like crystals found throughout its plant family — and every part of the plant is an irritant if chewed. The honest calibration, because this gets exaggerated in both directions: a pet that bites a peace lily leaf gets an immediate mouthful of burning irritation, and the typical sequel is drooling, pawing at the face, and sometimes vomiting. It is miserable, it is very rarely dangerous, and the plant defends itself on the first bite — which is why most encounters end after one exploratory chew. It is not a plant to panic about. It is a plant to place with a little respect: out of casual chewing reach for puppies and determined nibblers, fallen leaves picked up, cuttings kept on the counter rather than the floor. If a pet eats a real quantity and the drooling or vomiting doesn’t settle, call your vet and take a leaf along for identification. Clemson Extension’s peace lily factsheet covers the plant’s culture and its toxicity in the same no-drama terms.
Then the distinction that actually matters, and the reason this section exists. A peace lily is not a lily. It’s an aroid — family Araceae, kin to pothos and philodendron — that borrowed the name for its white spathe. The lilies that are genuinely, urgently dangerous to cats are the true lilies (Lilium species — Easter, tiger, Asiatic lilies) and daylilies (Hemerocallis), where even a small nibble or a dusting of pollen can cause acute kidney failure. A peace lily cannot do that; its crystals irritate the mouth and gut, and that’s the whole of its weaponry. So if you’re a cat owner choosing plants, spend your real caution on cut lily bouquets and garden daylilies, keep the peace lily sensibly placed — and if you want a plant you don’t have to think about at all, our spider plant care guide covers one of the genuinely pet-safe classics, a plant whose safety problem runs the other way: the cats are safe; the plant needs protection from the cats.
Frequently Asked Questions
How often should I water a peace lily? Whenever the top inch of soil has dried out — in most homes, roughly once a week in spring and summer and every couple of weeks in winter. Push a finger in and let the soil decide. The calendar version of this answer, applied blindly, is how peace lilies get drowned.
Why is my peace lily not blooming? Work the list in the Flowering section, in order: light first — a plant too dim to read a newspaper by will live but not flower; then age — young plants and fresh divisions need a year or so; then feeding — generous nitrogen-rich feeding grows leaves at the expense of flowers; then pot size — it blooms best snug. And remember the shop plant’s first flush was grower-scheduled with gibberellic acid, so home reblooming runs on seasons, not on the nursery’s clock.
How long does a peace lily take to perk up after watering? A thirsty-but-healthy plant starts lifting its leaves within the hour and is usually fully upright within a few hours; a severely parched one may need overnight. If it’s still flat the next morning in soil that’s now moist, that’s no longer thirst — read the drooping fork in the problems section and check the roots.
Are peace lilies safe for cats? They’re irritating, not deadly: chewing causes a burning mouth, drooling, and sometimes vomiting from calcium oxalate crystals, and most cats stop at one bite. Crucially, a peace lily is not a true lily — the lilies that can cause kidney failure in cats are true lilies and daylilies. Place the peace lily out of nibbling reach and save your real vigilance for lily bouquets.
Why are my peace lily’s flowers turning green? Because the “flower” is a modified leaf. A spathe past its first week or two starts photosynthesizing and greens as it ages — normal, harmless, and it can stay presentable for weeks more. Blooms that open green from the start usually signal low light. Neither kind turns white again; cut greened-out spathes at the base when they stop pleasing you.
Can I propagate a peace lily from a leaf cutting? No. A peace lily has no stem nodes to root from; a leaf in water may root and linger, but it will never grow into a plant. Division at repotting — splitting the crown cluster into pieces that each keep their own roots — is the only method, and it’s an easy one.
When should I repot my peace lily? On evidence: roots escaping the drainage holes, the plant heaving itself up or drying out again within a day or two of watering, or a pot that’s become a solid thicket of crowns. Move up one size only, ideally in spring — and remember that repotting day is also division day if you want more plants.
How big will my peace lily get, and how long will it live? Depends on the variety: a tabletop wallisii stays around a foot to eighteen inches; the common florist types reach two to three feet; ‘Sensation’ can pass four feet with leaves to match. As for lifespan — a peace lily that gets divided and repotted as it grows can live for many years, far longer than the three-to-five years you’ll see quoted. It’s a plant you renew rather than replace.
Should I mist my peace lily? You can, but it won’t do what you hope. Misting raises the humidity around a leaf for a few minutes and leaves water sitting where fungal spots like to start. If your air is genuinely dry, a humidifier in the room, a spot in a bright bathroom, or grouping plants together all do the real work. Peace lilies appreciate humidity; they don’t need a spray bottle’s devotion.
Can I grow a peace lily in water? Yes, as an experiment — peace lilies adapt to water culture reasonably well. Rinse every trace of soil from the roots, set the plant in a vase with the crown above the waterline, change the water weekly so it never stagnates, and add a drop of liquid fertilizer monthly. But be clear-eyed: soil-grown plants are healthier long-term and far more likely to bloom. Water culture is a look, not an upgrade.
Give a peace lily real light, soil that stays evenly moist without ever drowning, a light hand with the fertilizer bottle, and a warm corner away from drafts, and it will do the rest itself — glossy leaves, a spring flush of white sails, and the occasional forgiven swoon when you forget it on vacation. That’s the whole care guide, and it’s why this plant has been handed to beginners, with confidence, for a hundred years.